Giacomo Balla’s Stained Glass Window
by adinaroth
This week our assignment was to “Make a piece of flexible non-woven fabric at least 6″x6″ (~15cm x 15cm) with some noteworthy characteristic. (An unusual blend of materials, interesting structural characteristics, embedded circuitry, special electrical properties …?)” We were given a tutorial on casting latex rubber and silicone. I practiced using the latex rubber and placed material in the latex (see below). What I really wanted to do though was use LED’s in a silicone cast circuit.
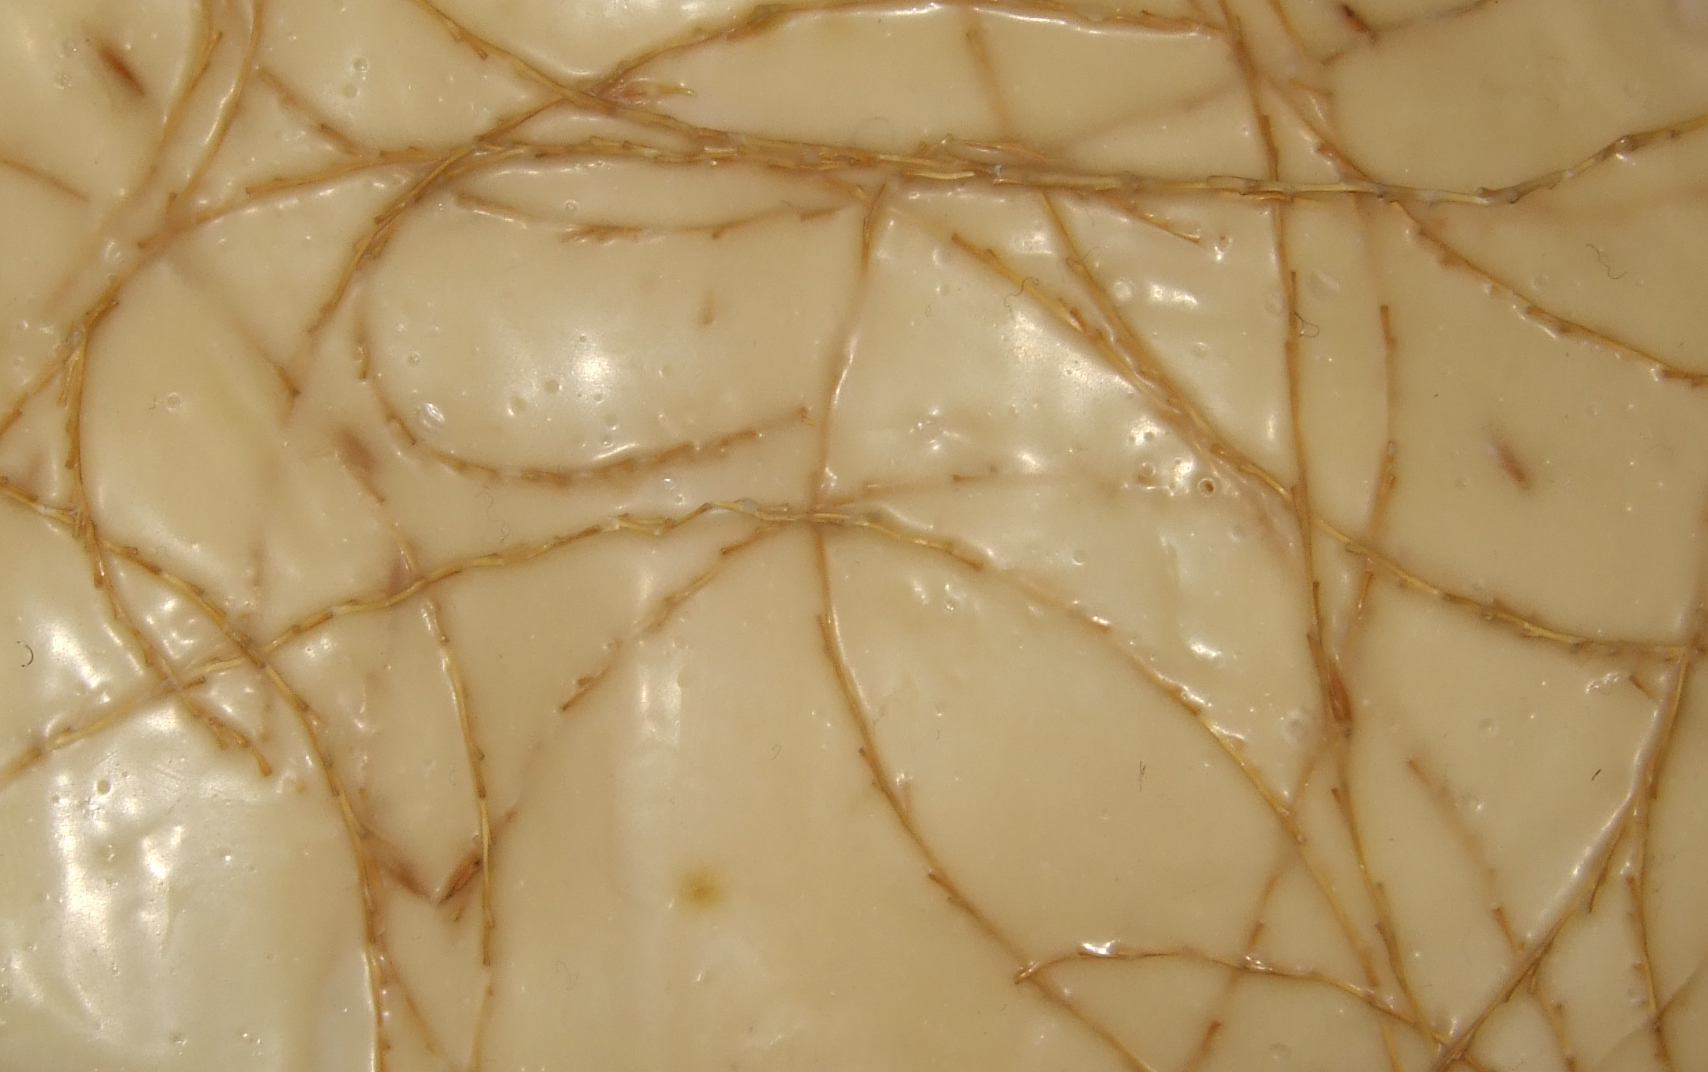
Dried leaves in latex

Leaves in latex
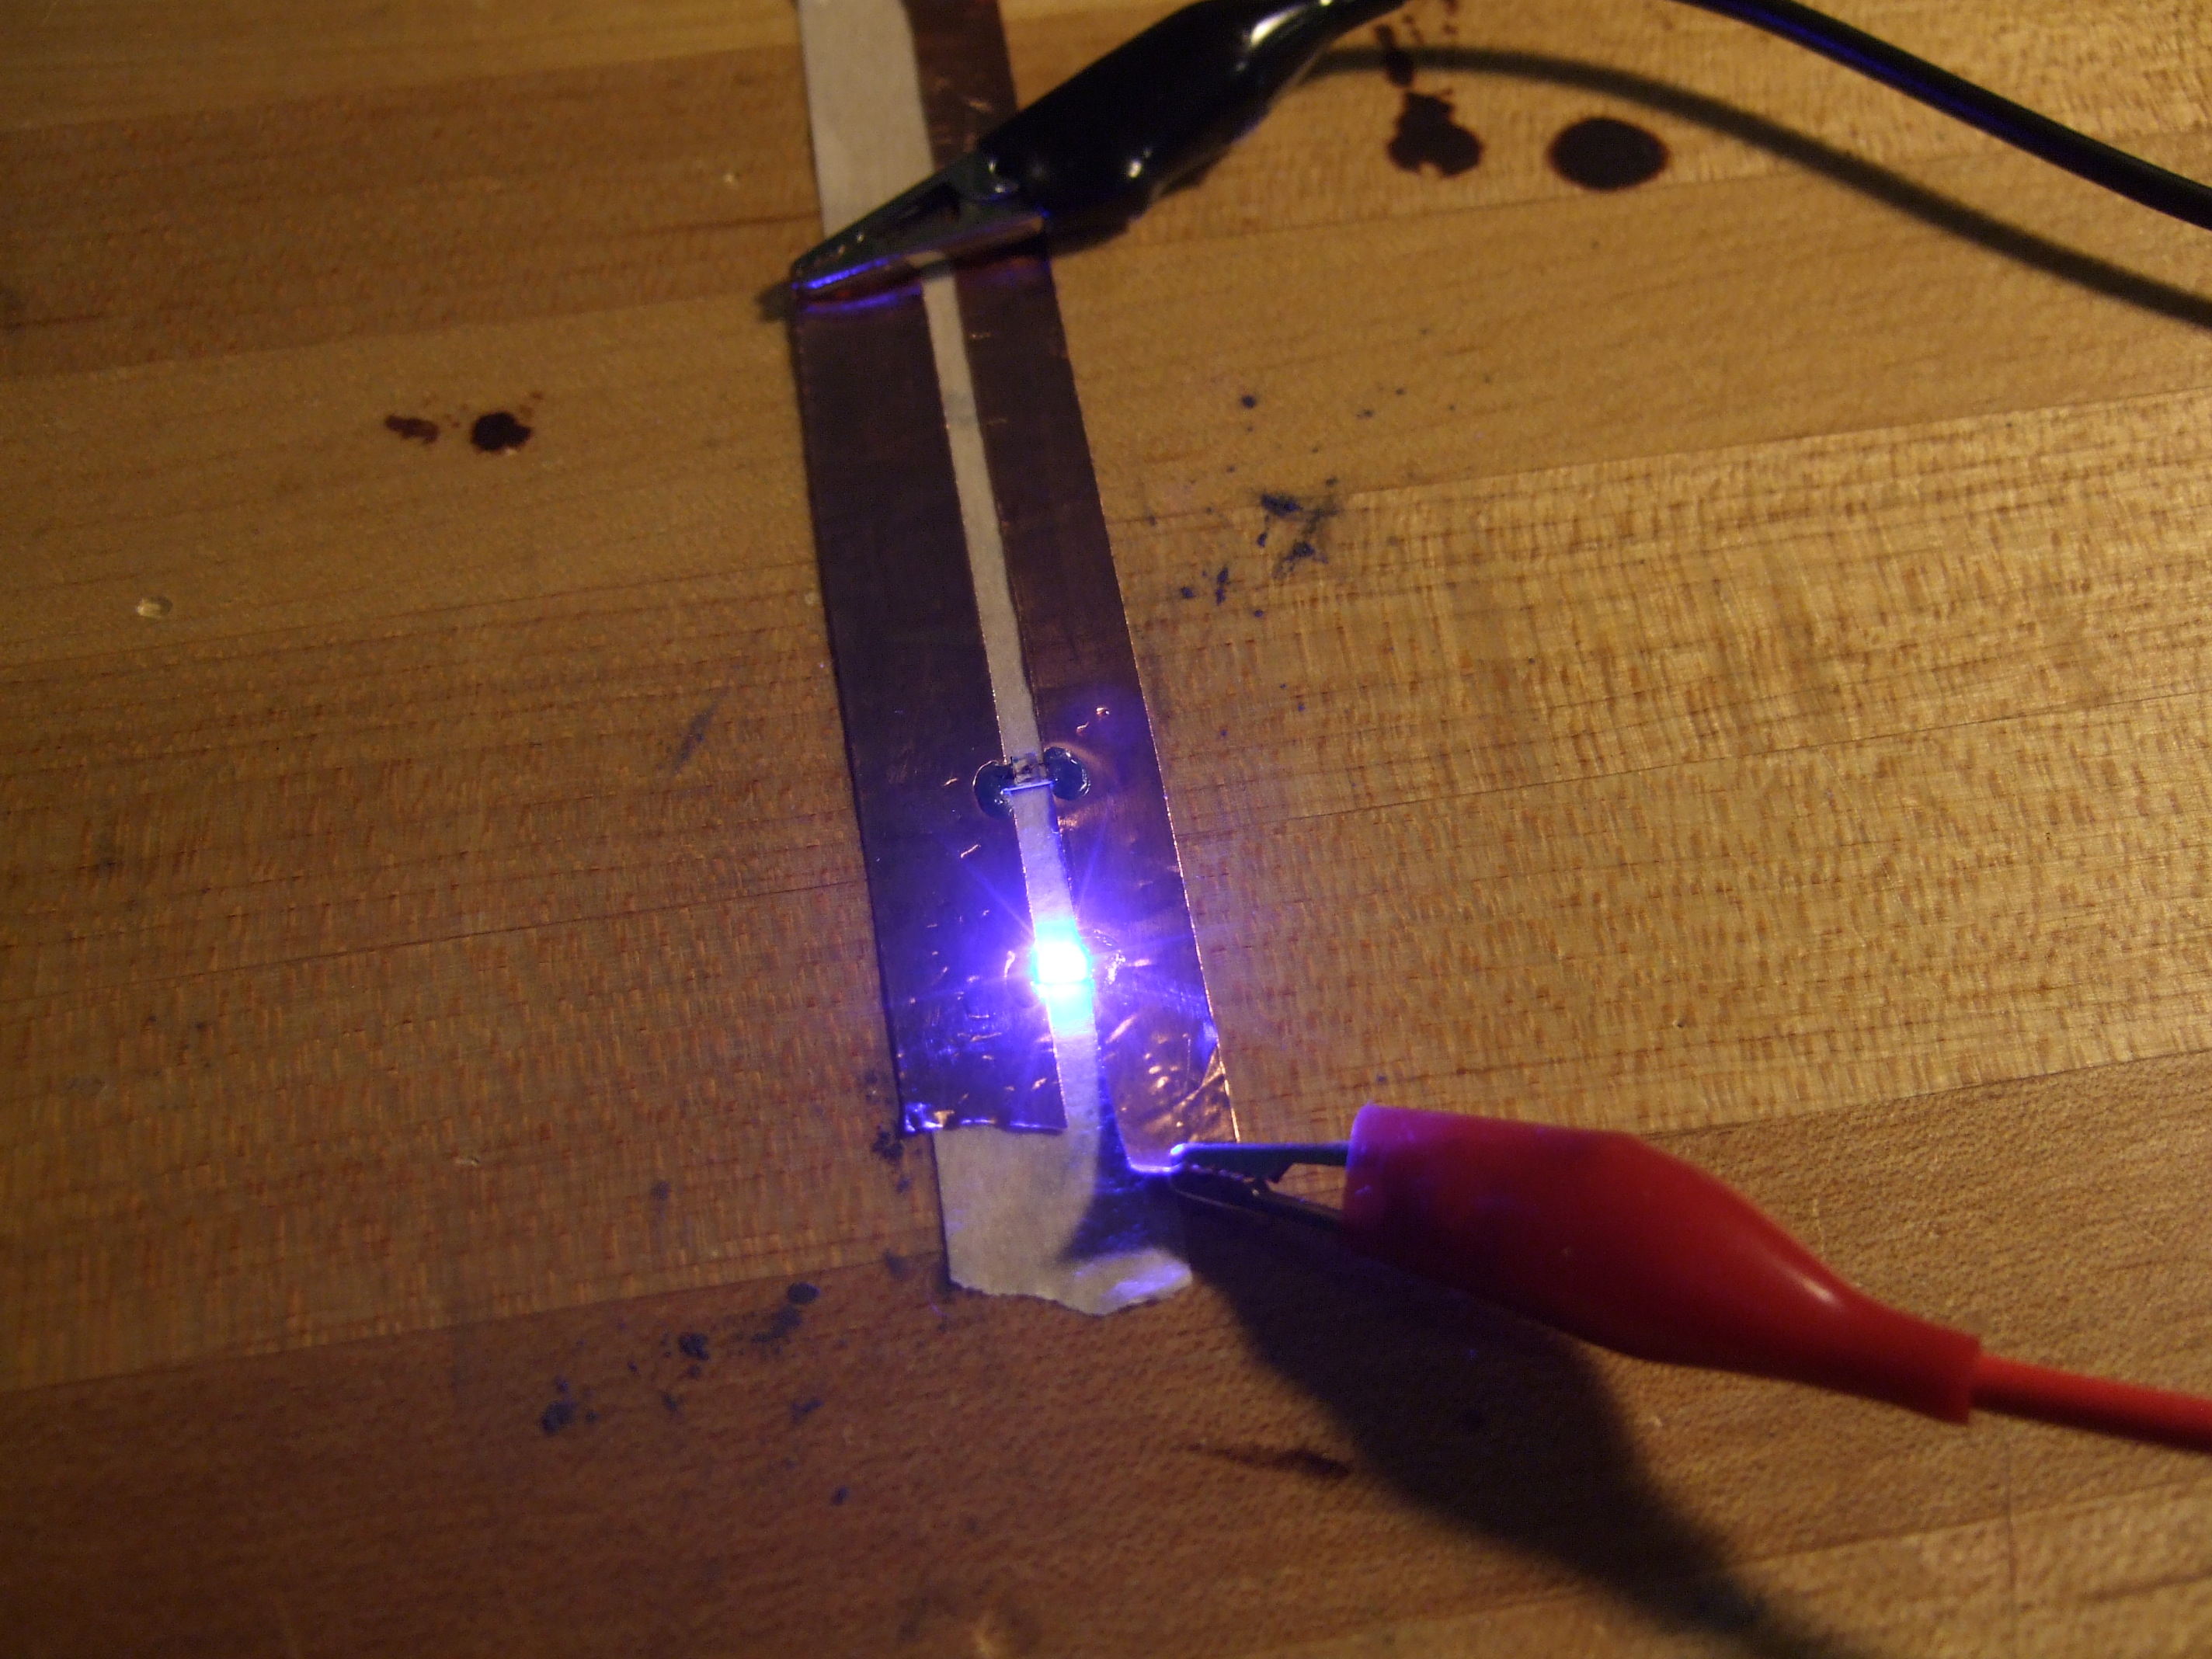
Testing of LED on copper tape
The second thing I did after trying the latex was test the potential of a simple circuit using an LED, copper tape, and power (3.7V max). In my photo above my LED lit brightly and my simple circuit was a success.
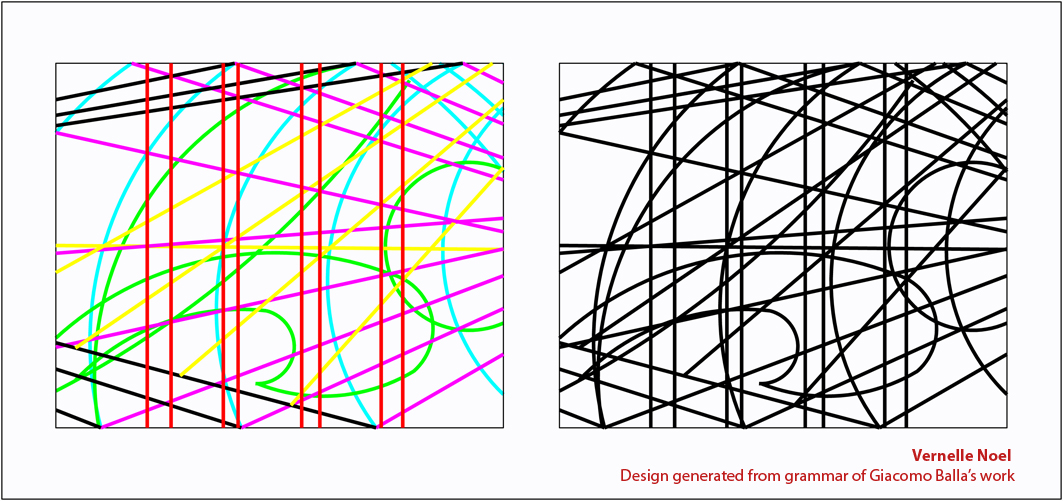
Designs generated using Balla Grammar
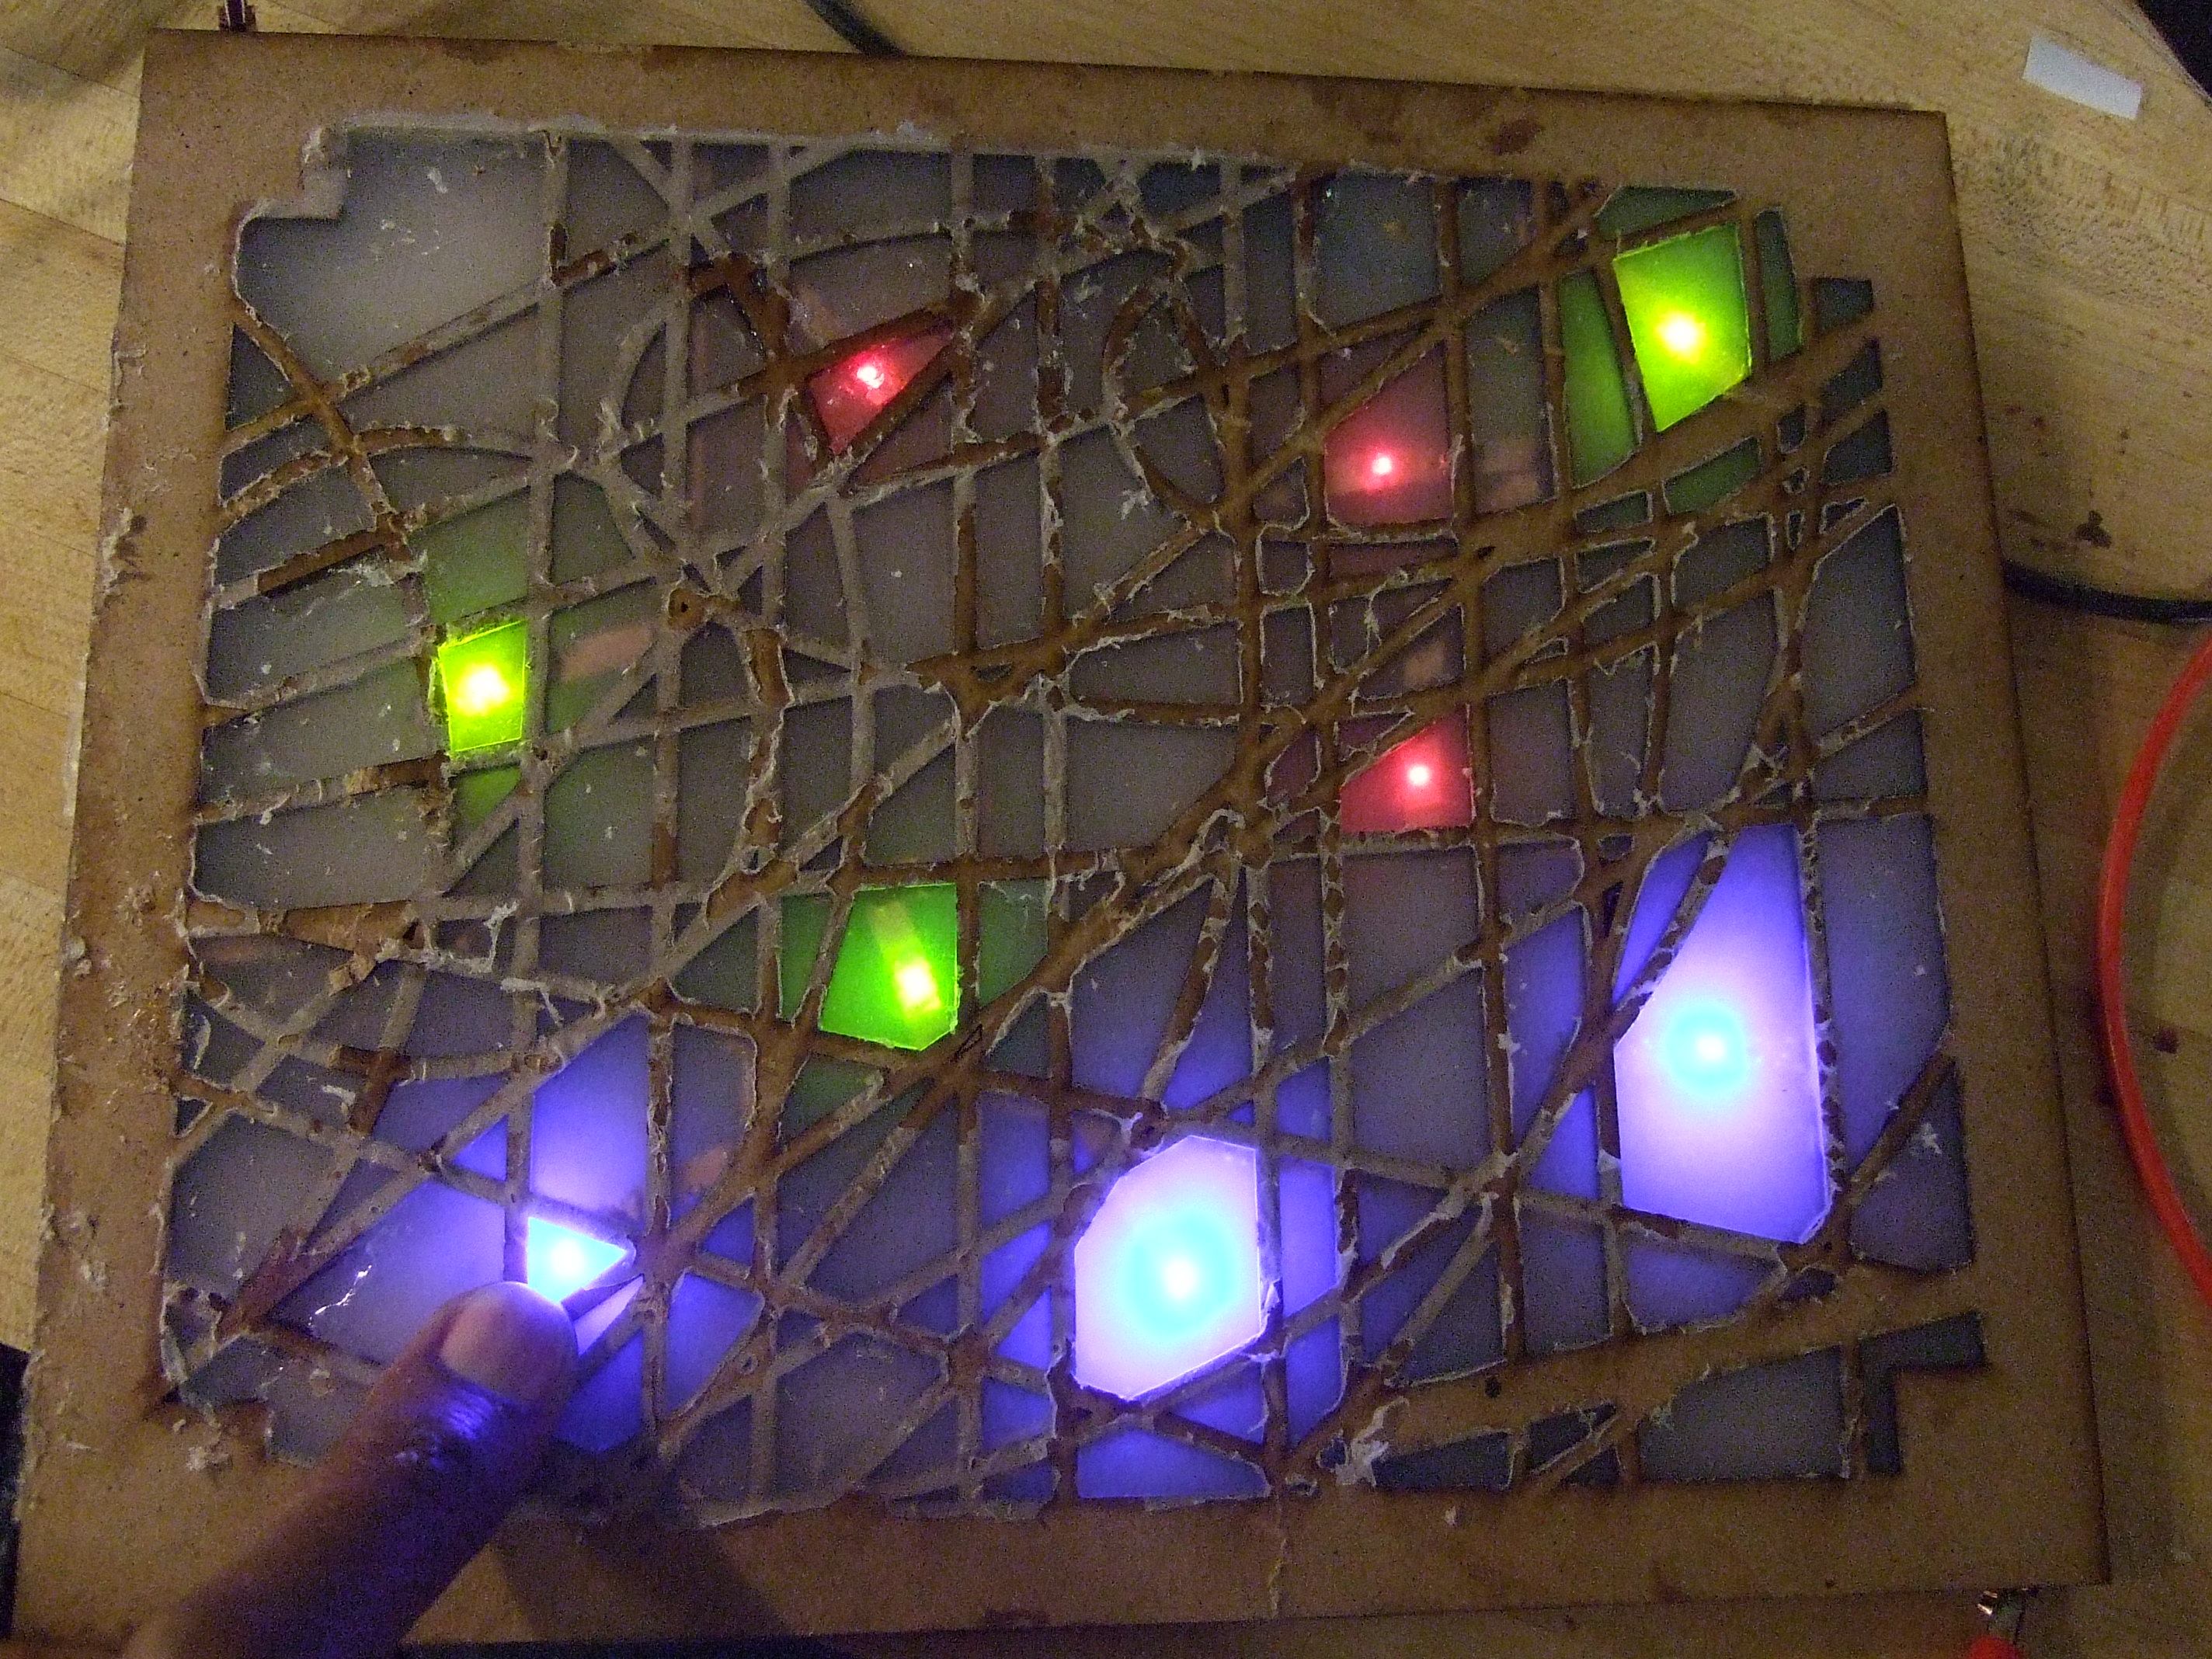
I love the work of Italian futurist painter, Giacomo Balla, and last semester I developed a shape grammar of his work, i.e. a computational approach to the generation of Balla-esque paintings. I decided I would use one of my designs using his grammar as the design for my silicone cast LED circuit. I modeled the design to create 3-dimensional character and for cutting of the mold. below are images of the “stained window” design.
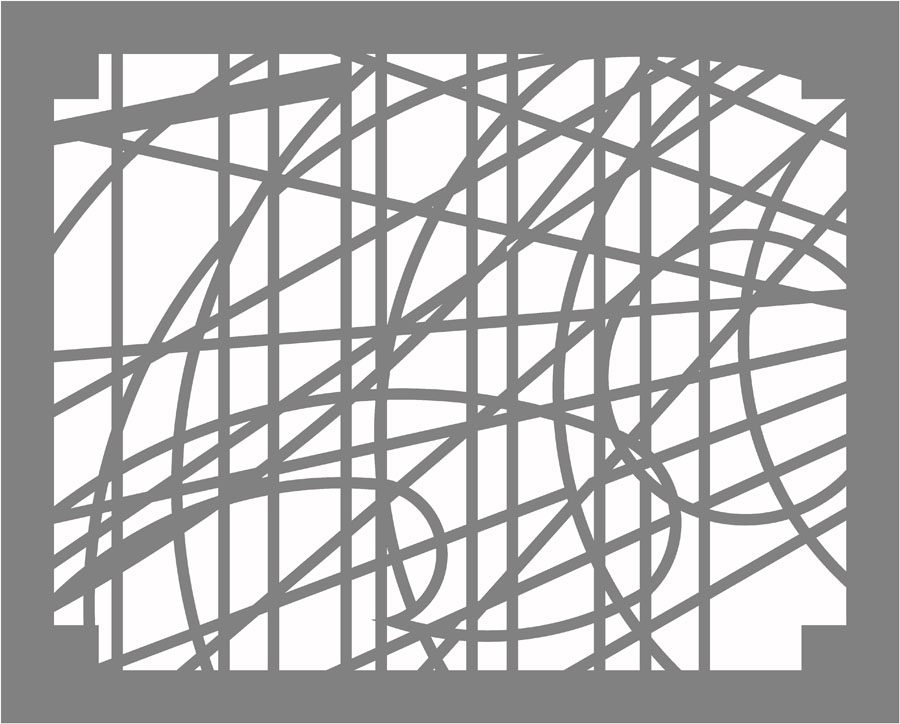
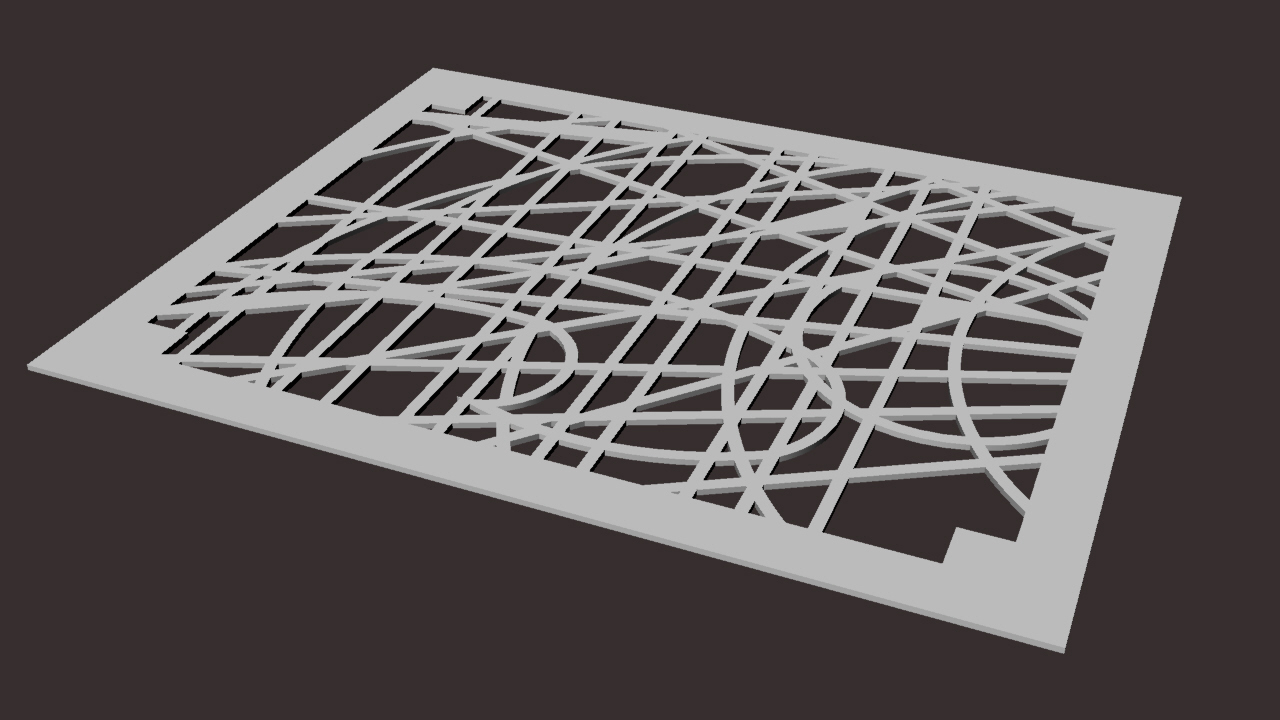
Model & render of the Balla grammar design
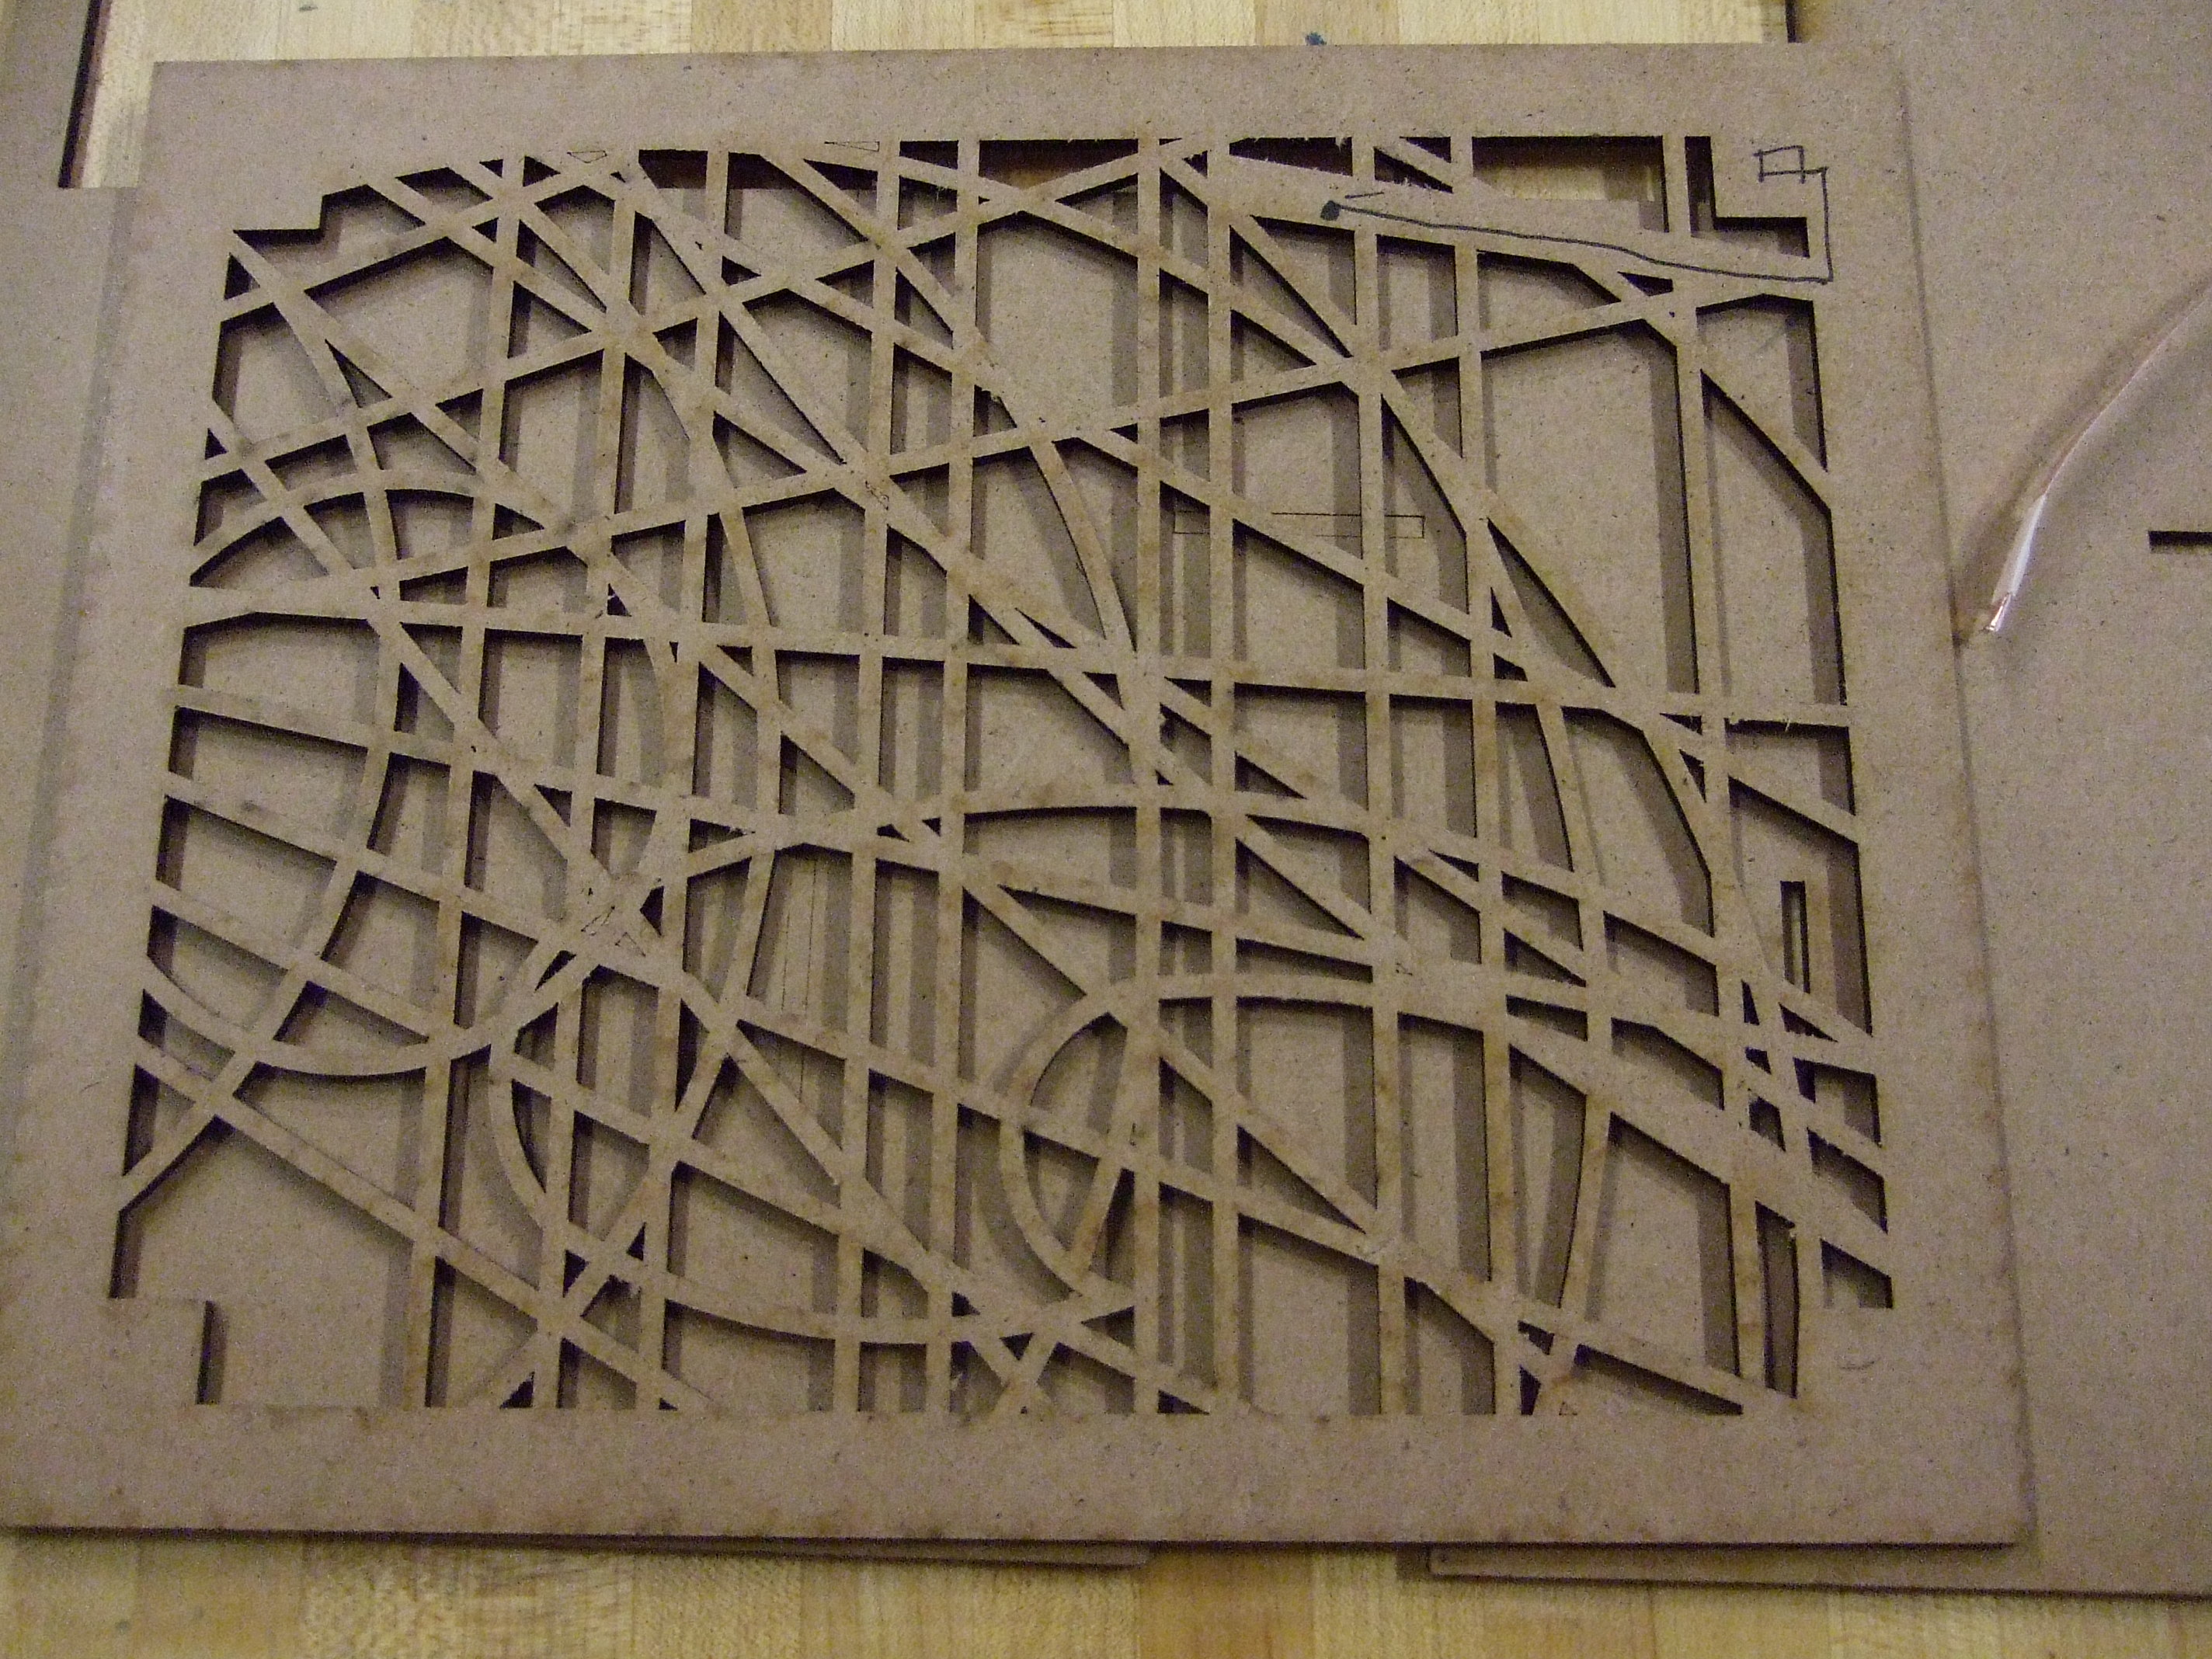
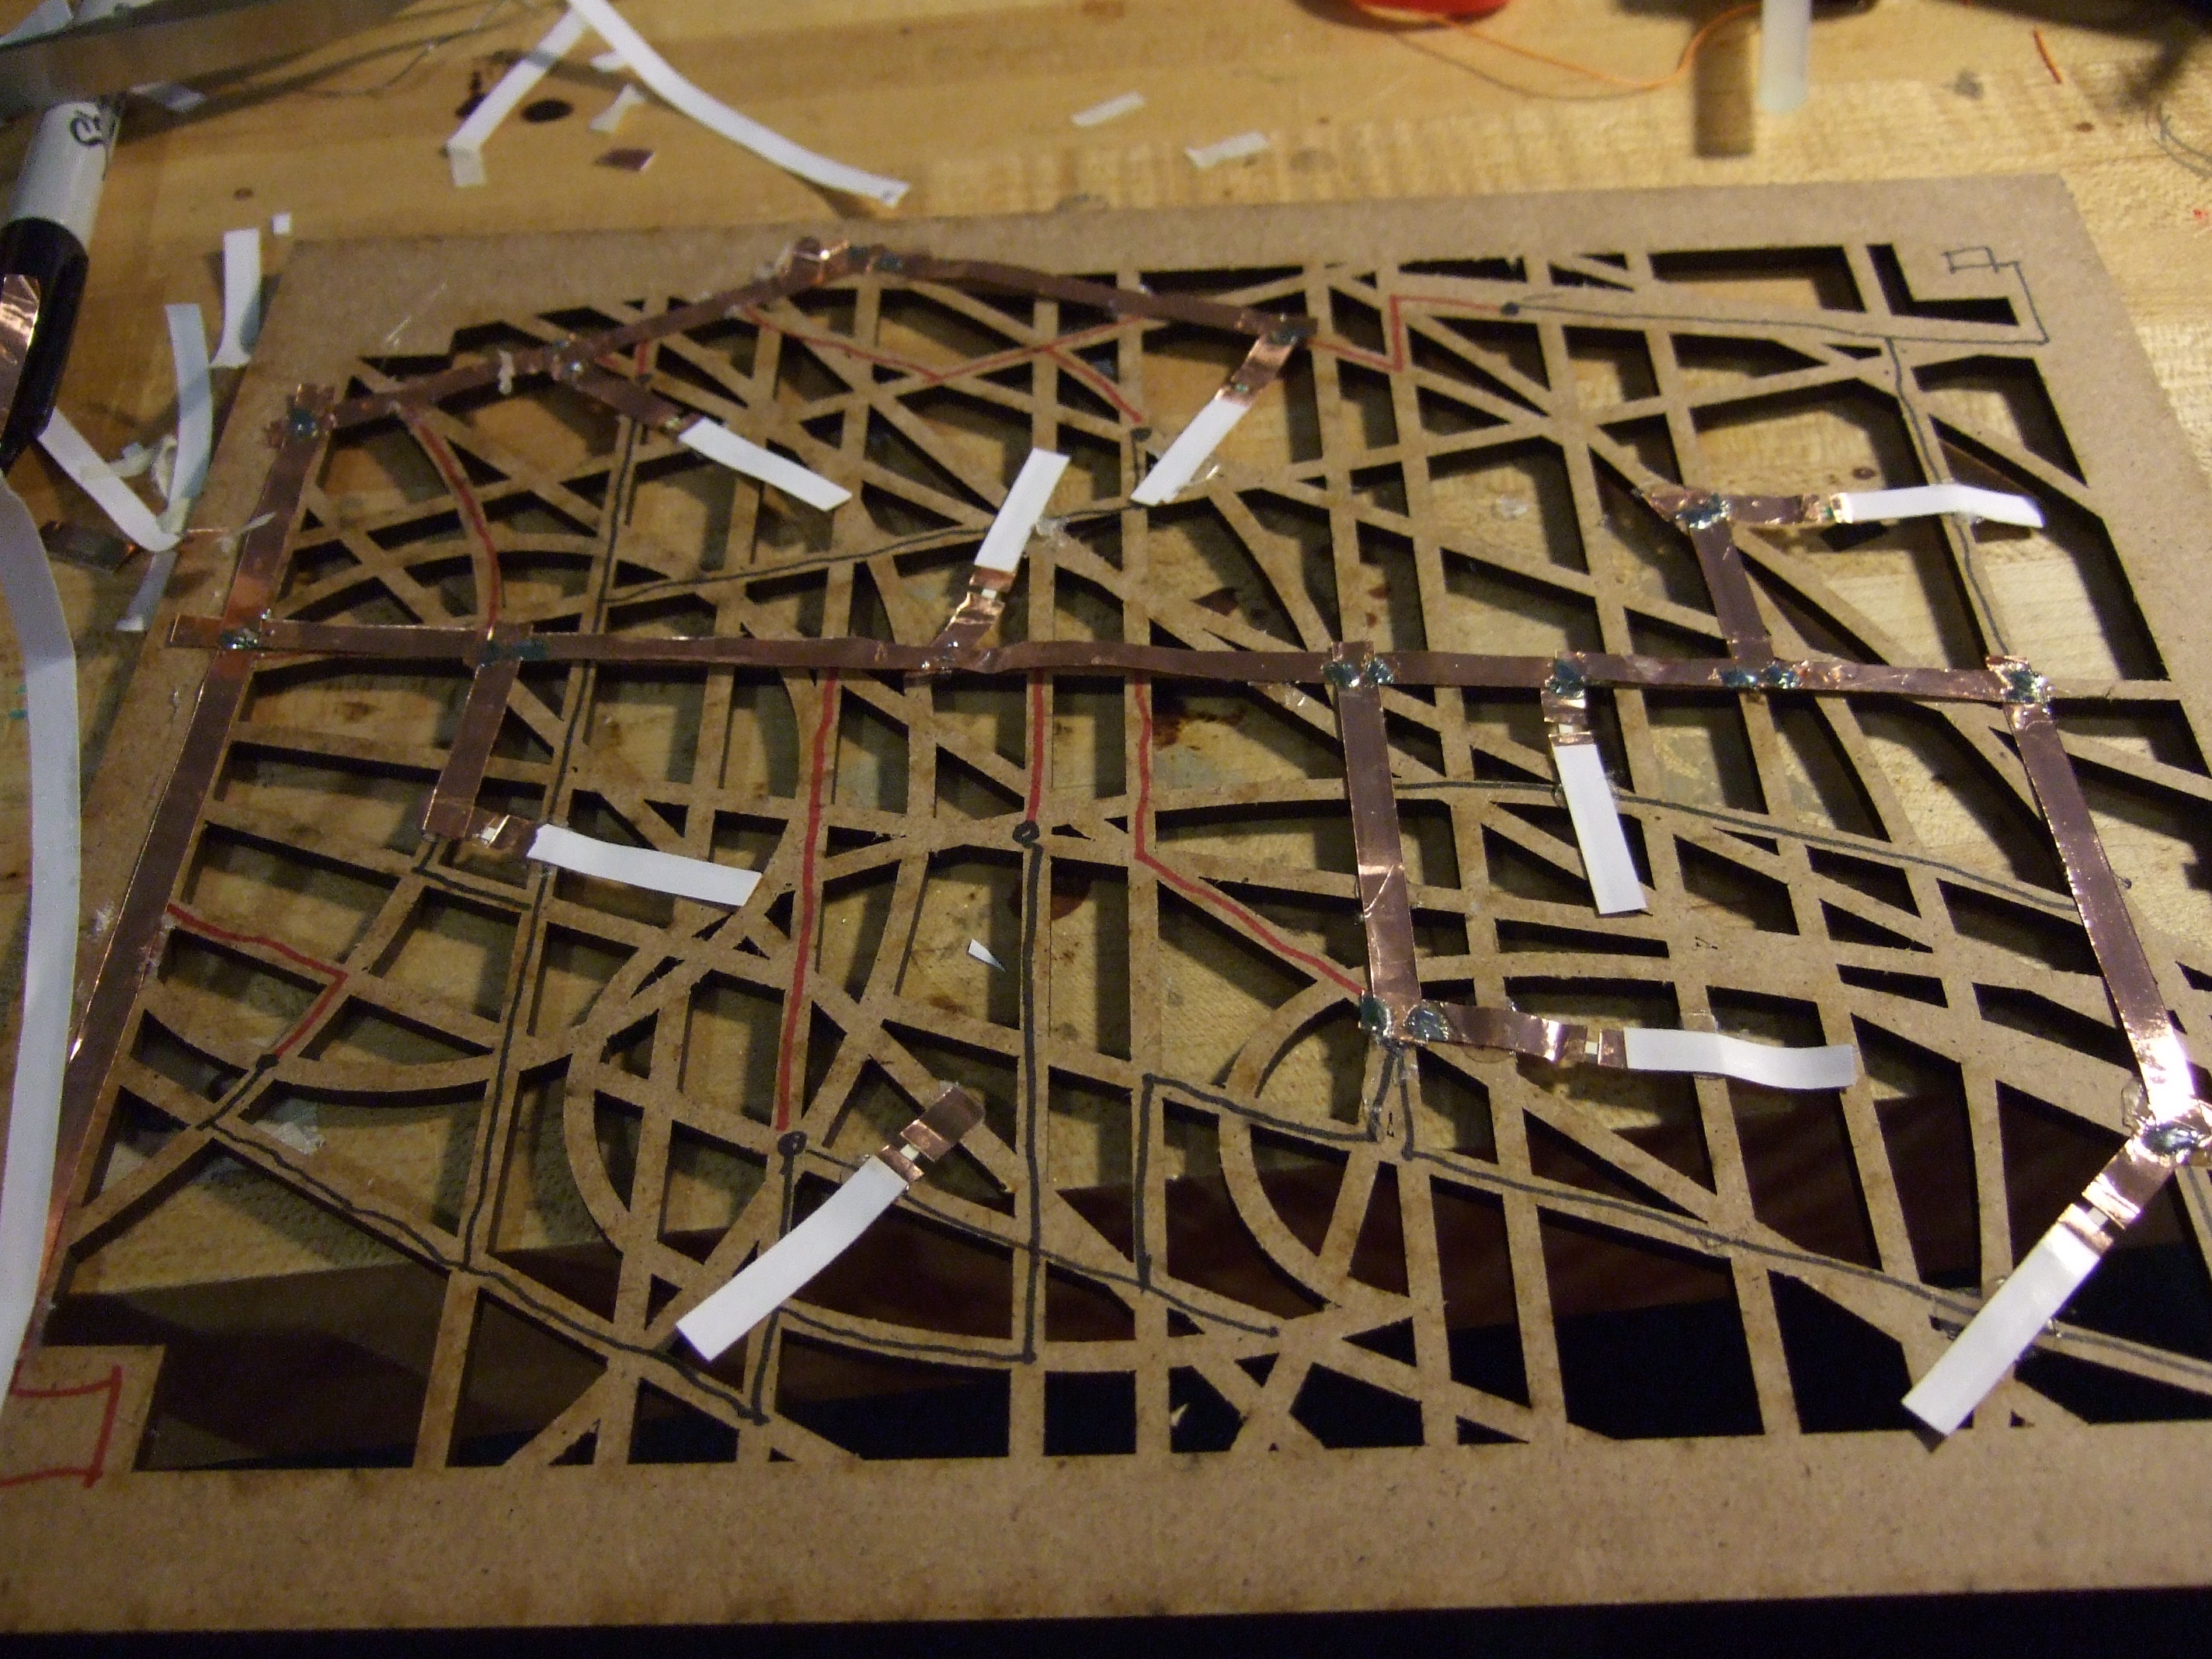
Design laser cut from Masonite
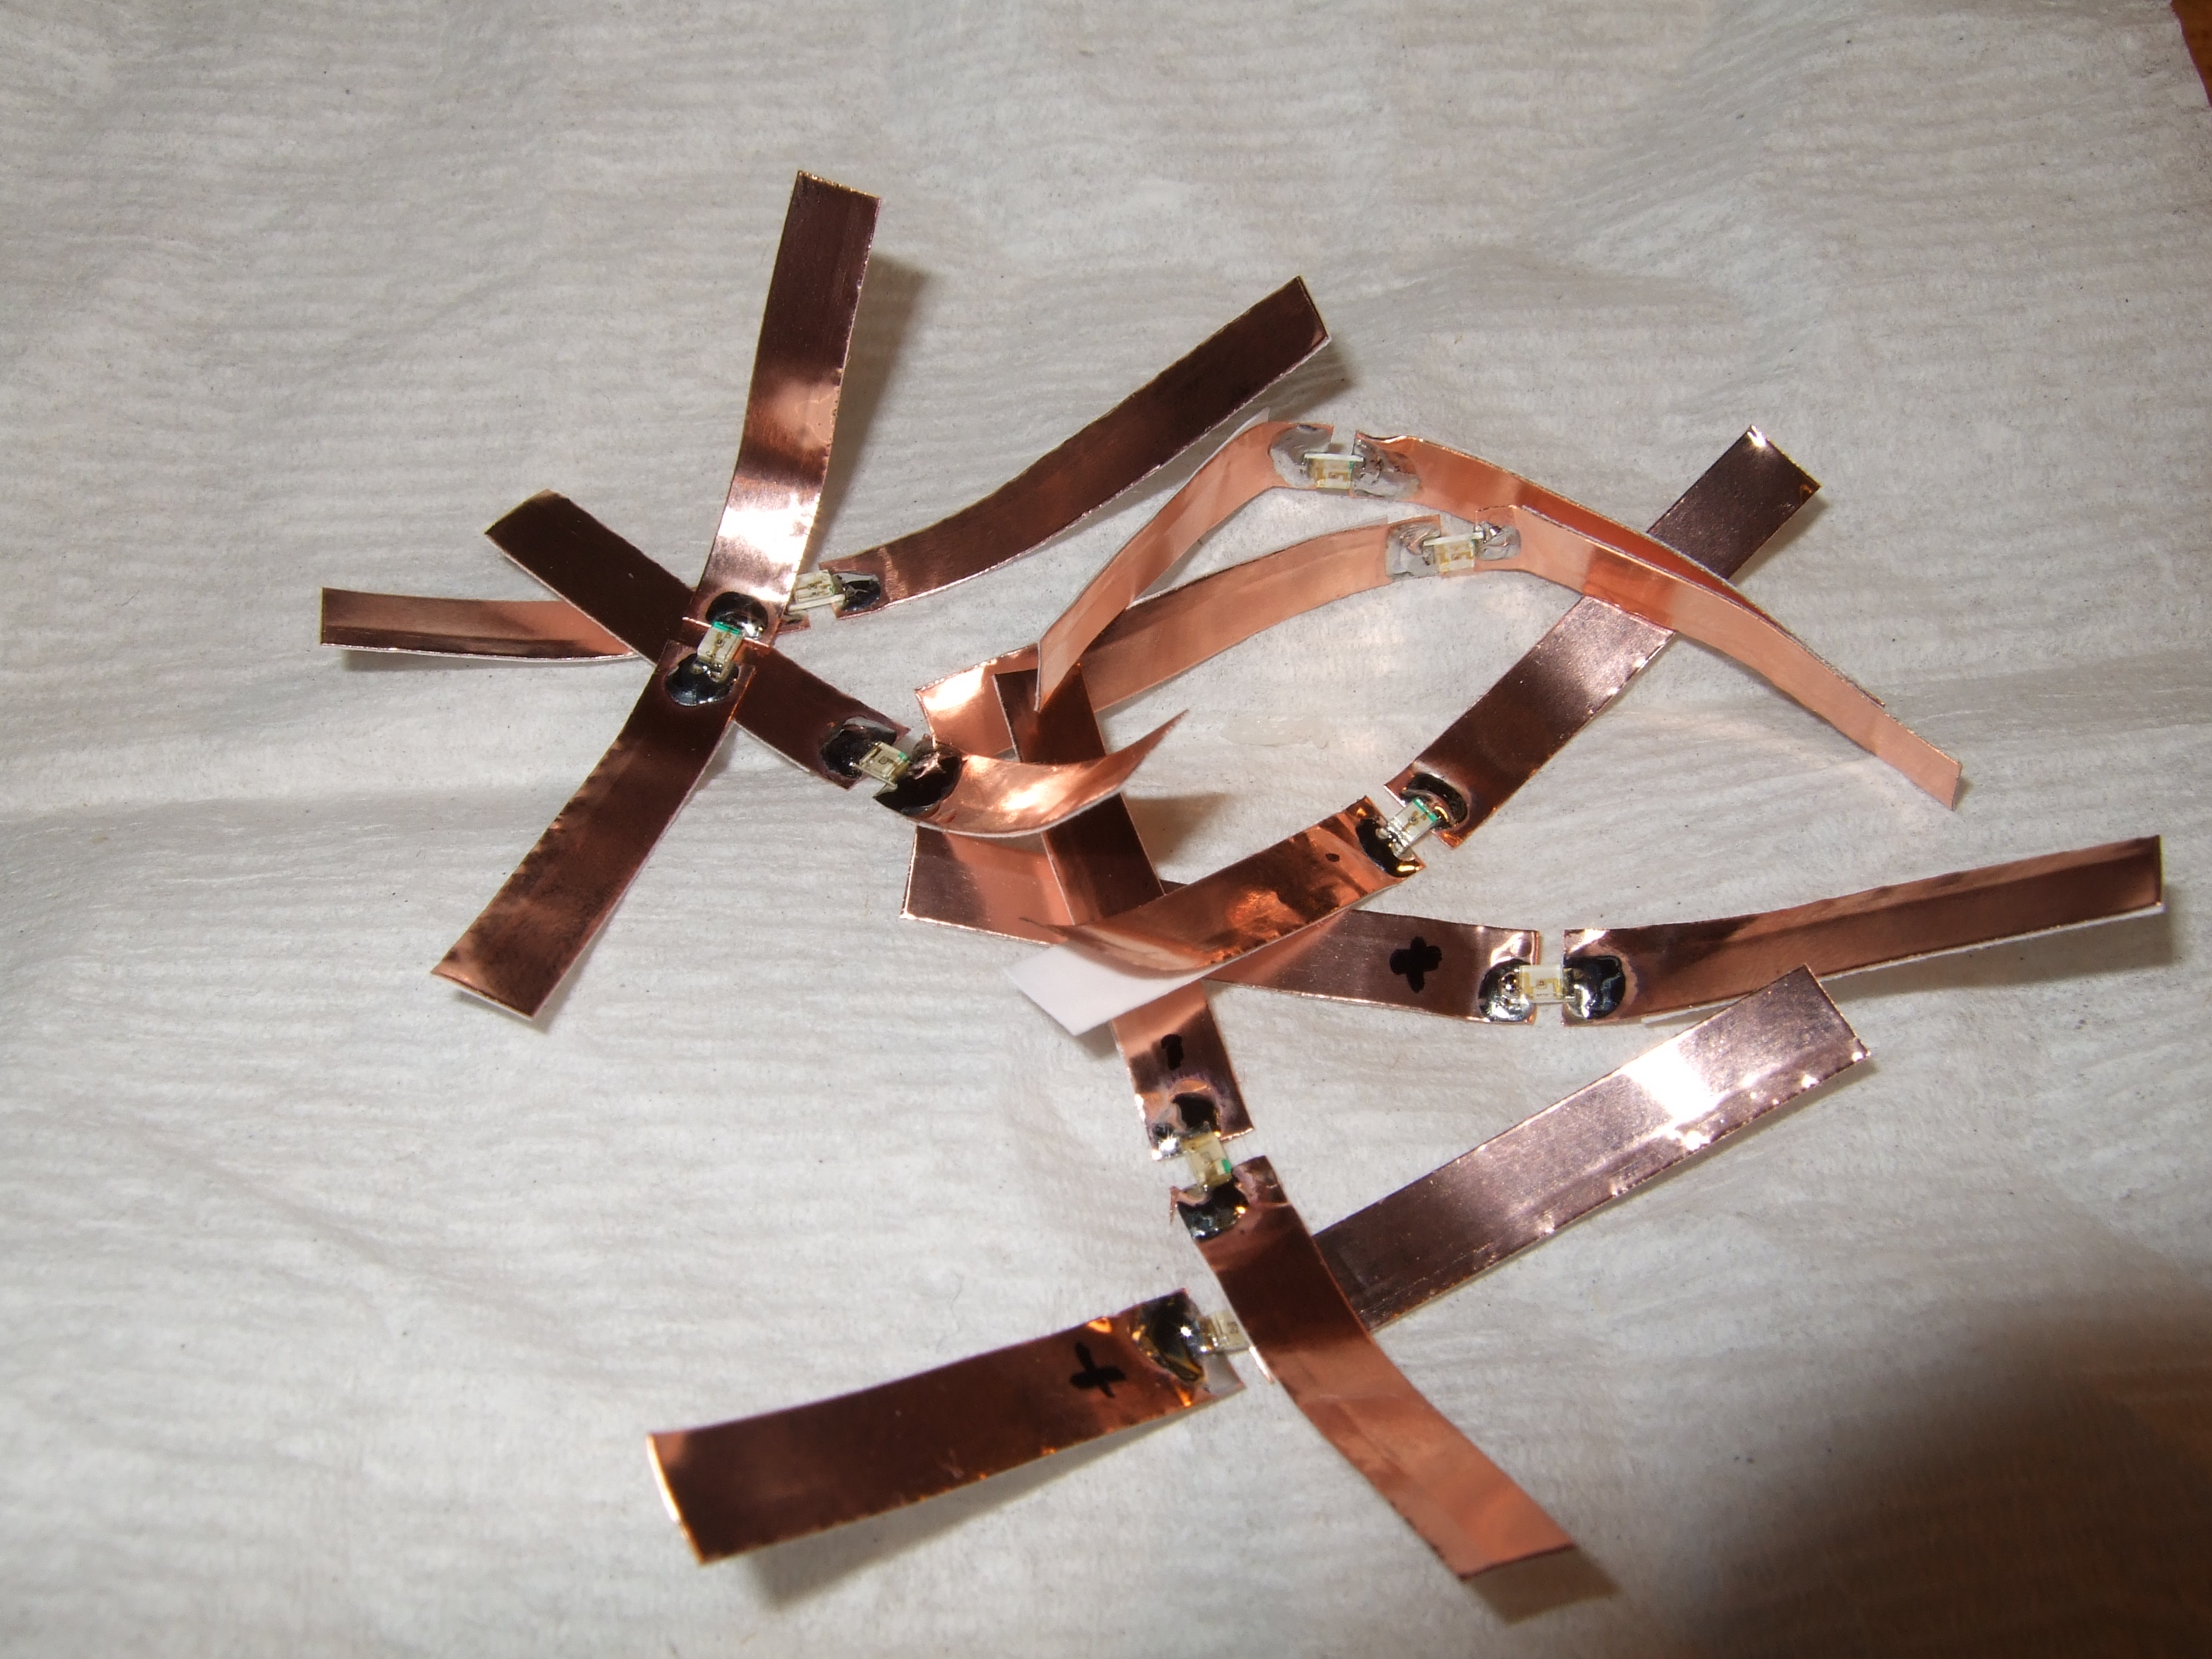
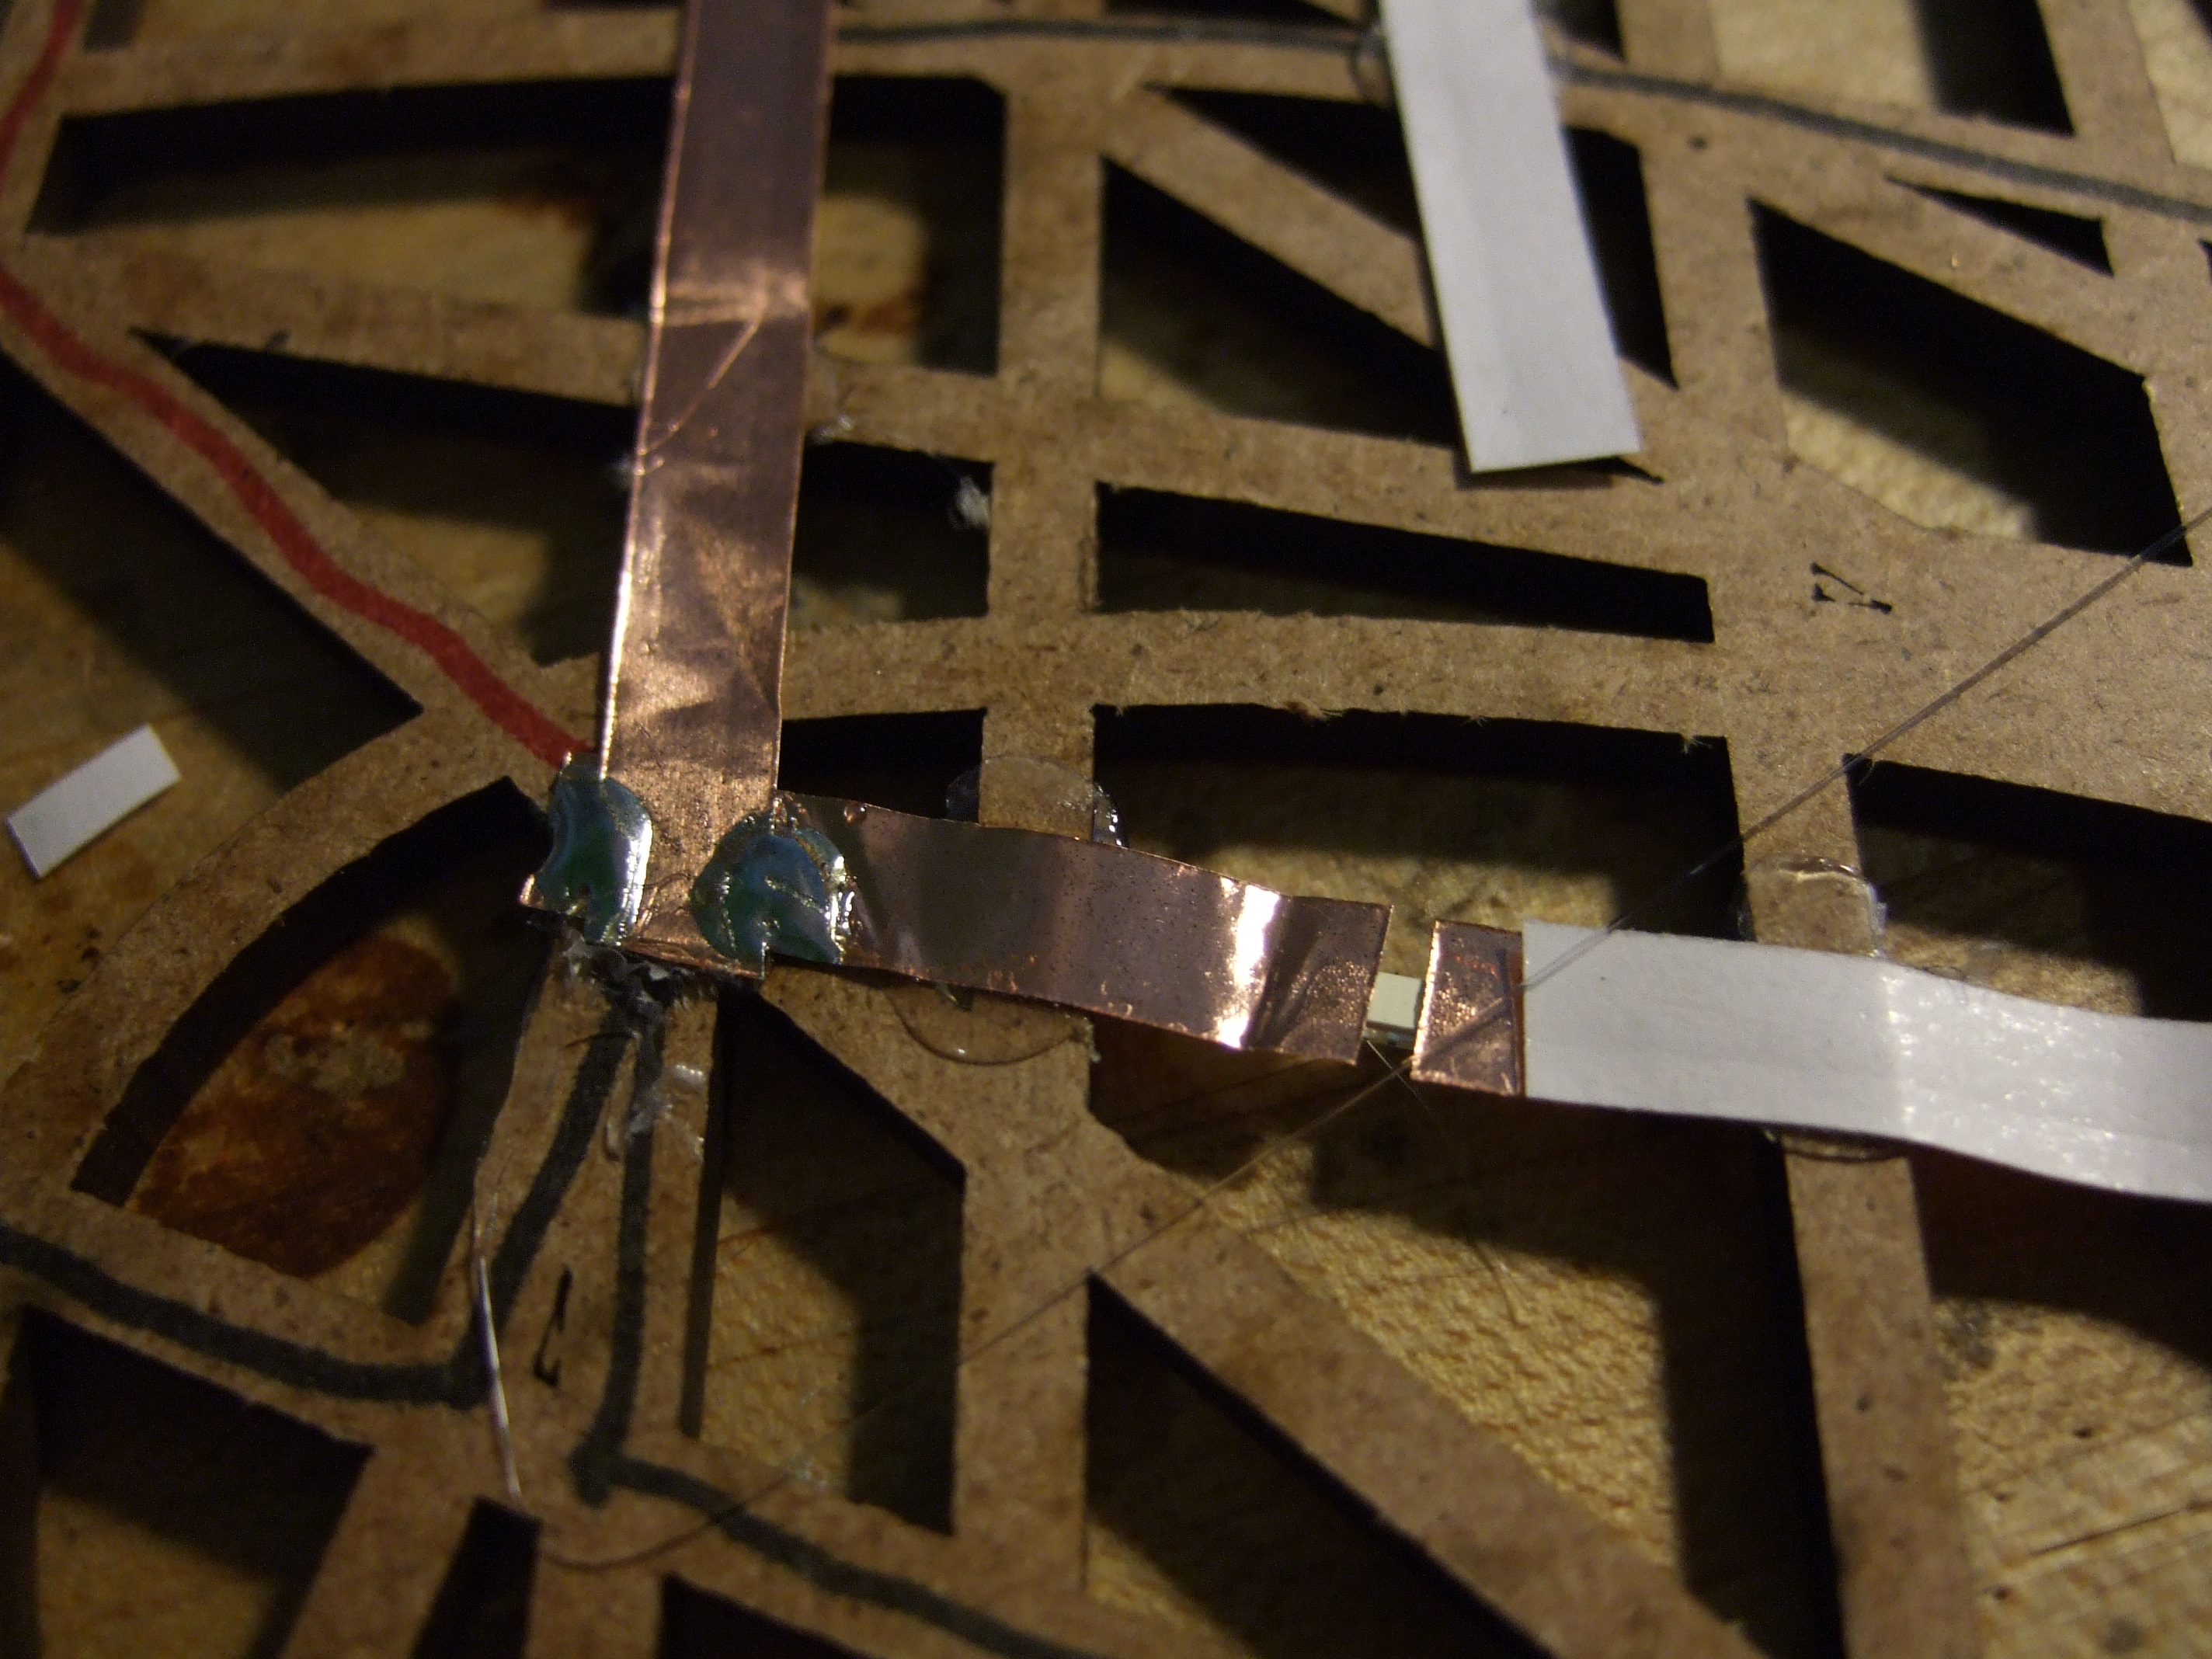
I soldered my LEDs unto copper tape (separately) for easier placement and working into the circuit.
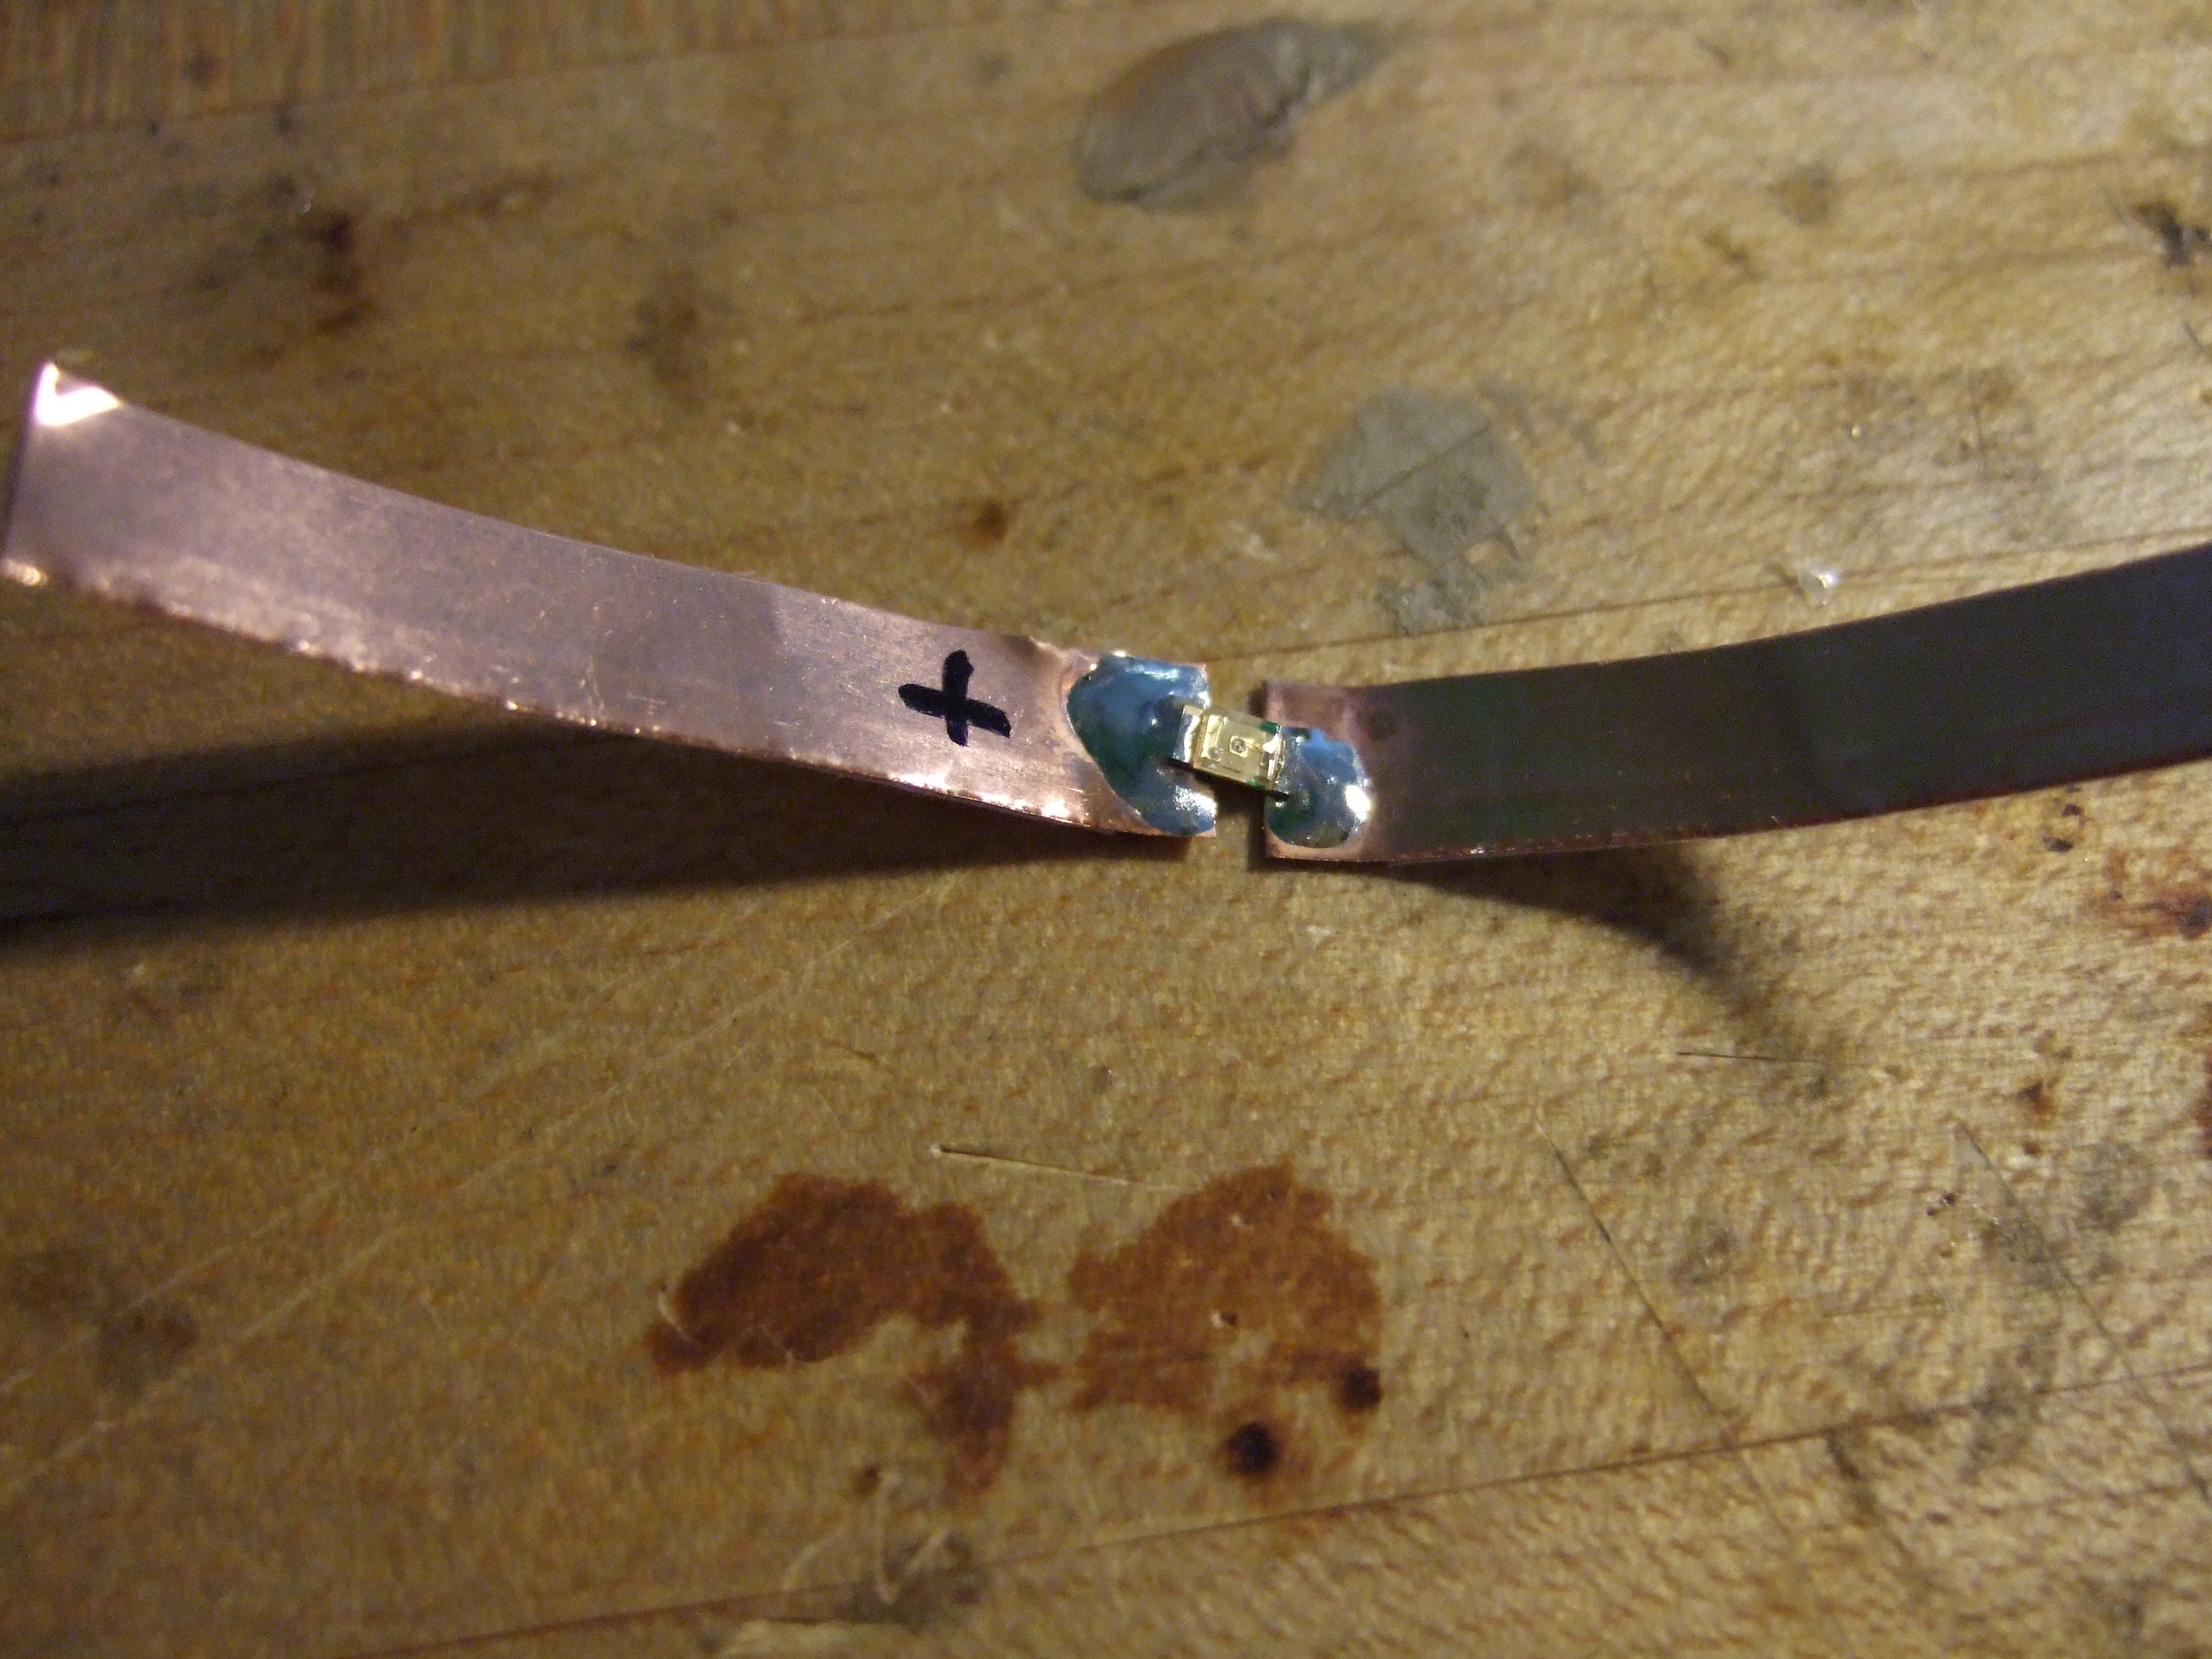
At the back of my mold I drew the negative lines (red) and the positive lines (black) of the circuit as a guide. This would influence the direction in which I laid my LED’s for efficient wiring of the circuit to the positive or negative sides of the LEDs. See wiring and soldering below.
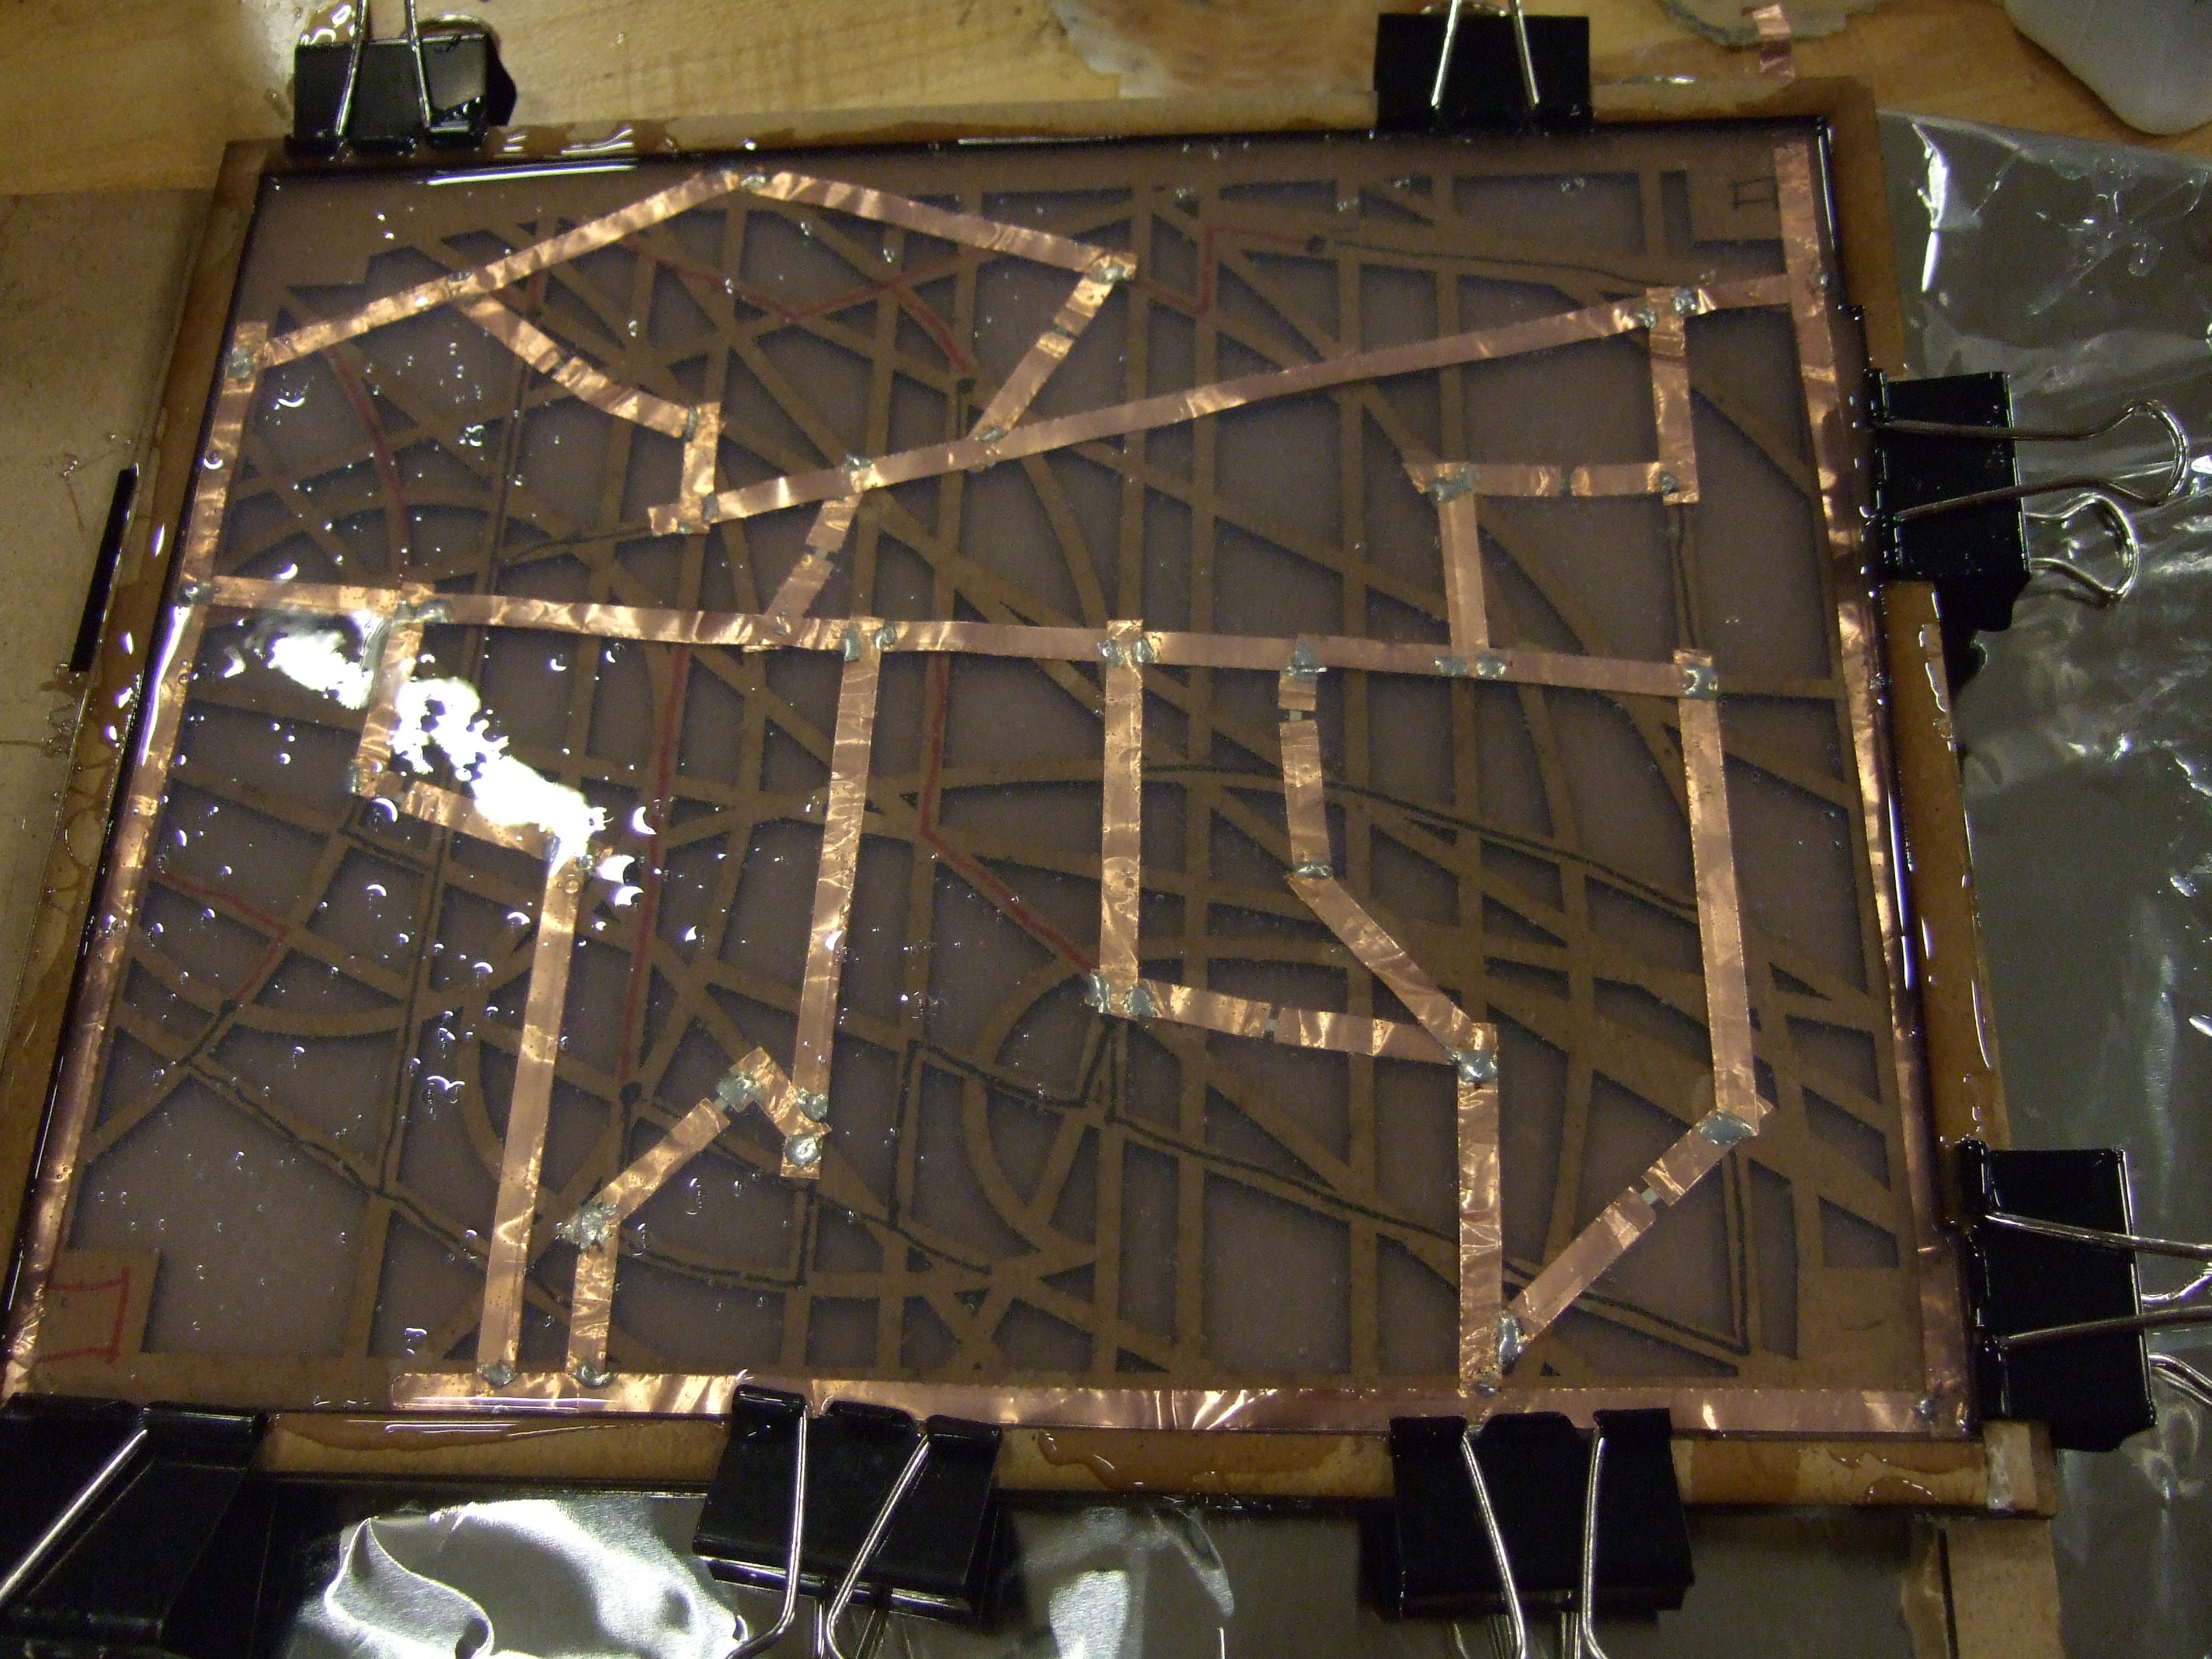
After installing my circuit with LEDs and securing my mold, I made my silicone mixture (equal parts of Part A and Part B) and poured it – it is very viscous – into my mold. The stipulated time for curing is 1.5 hours.
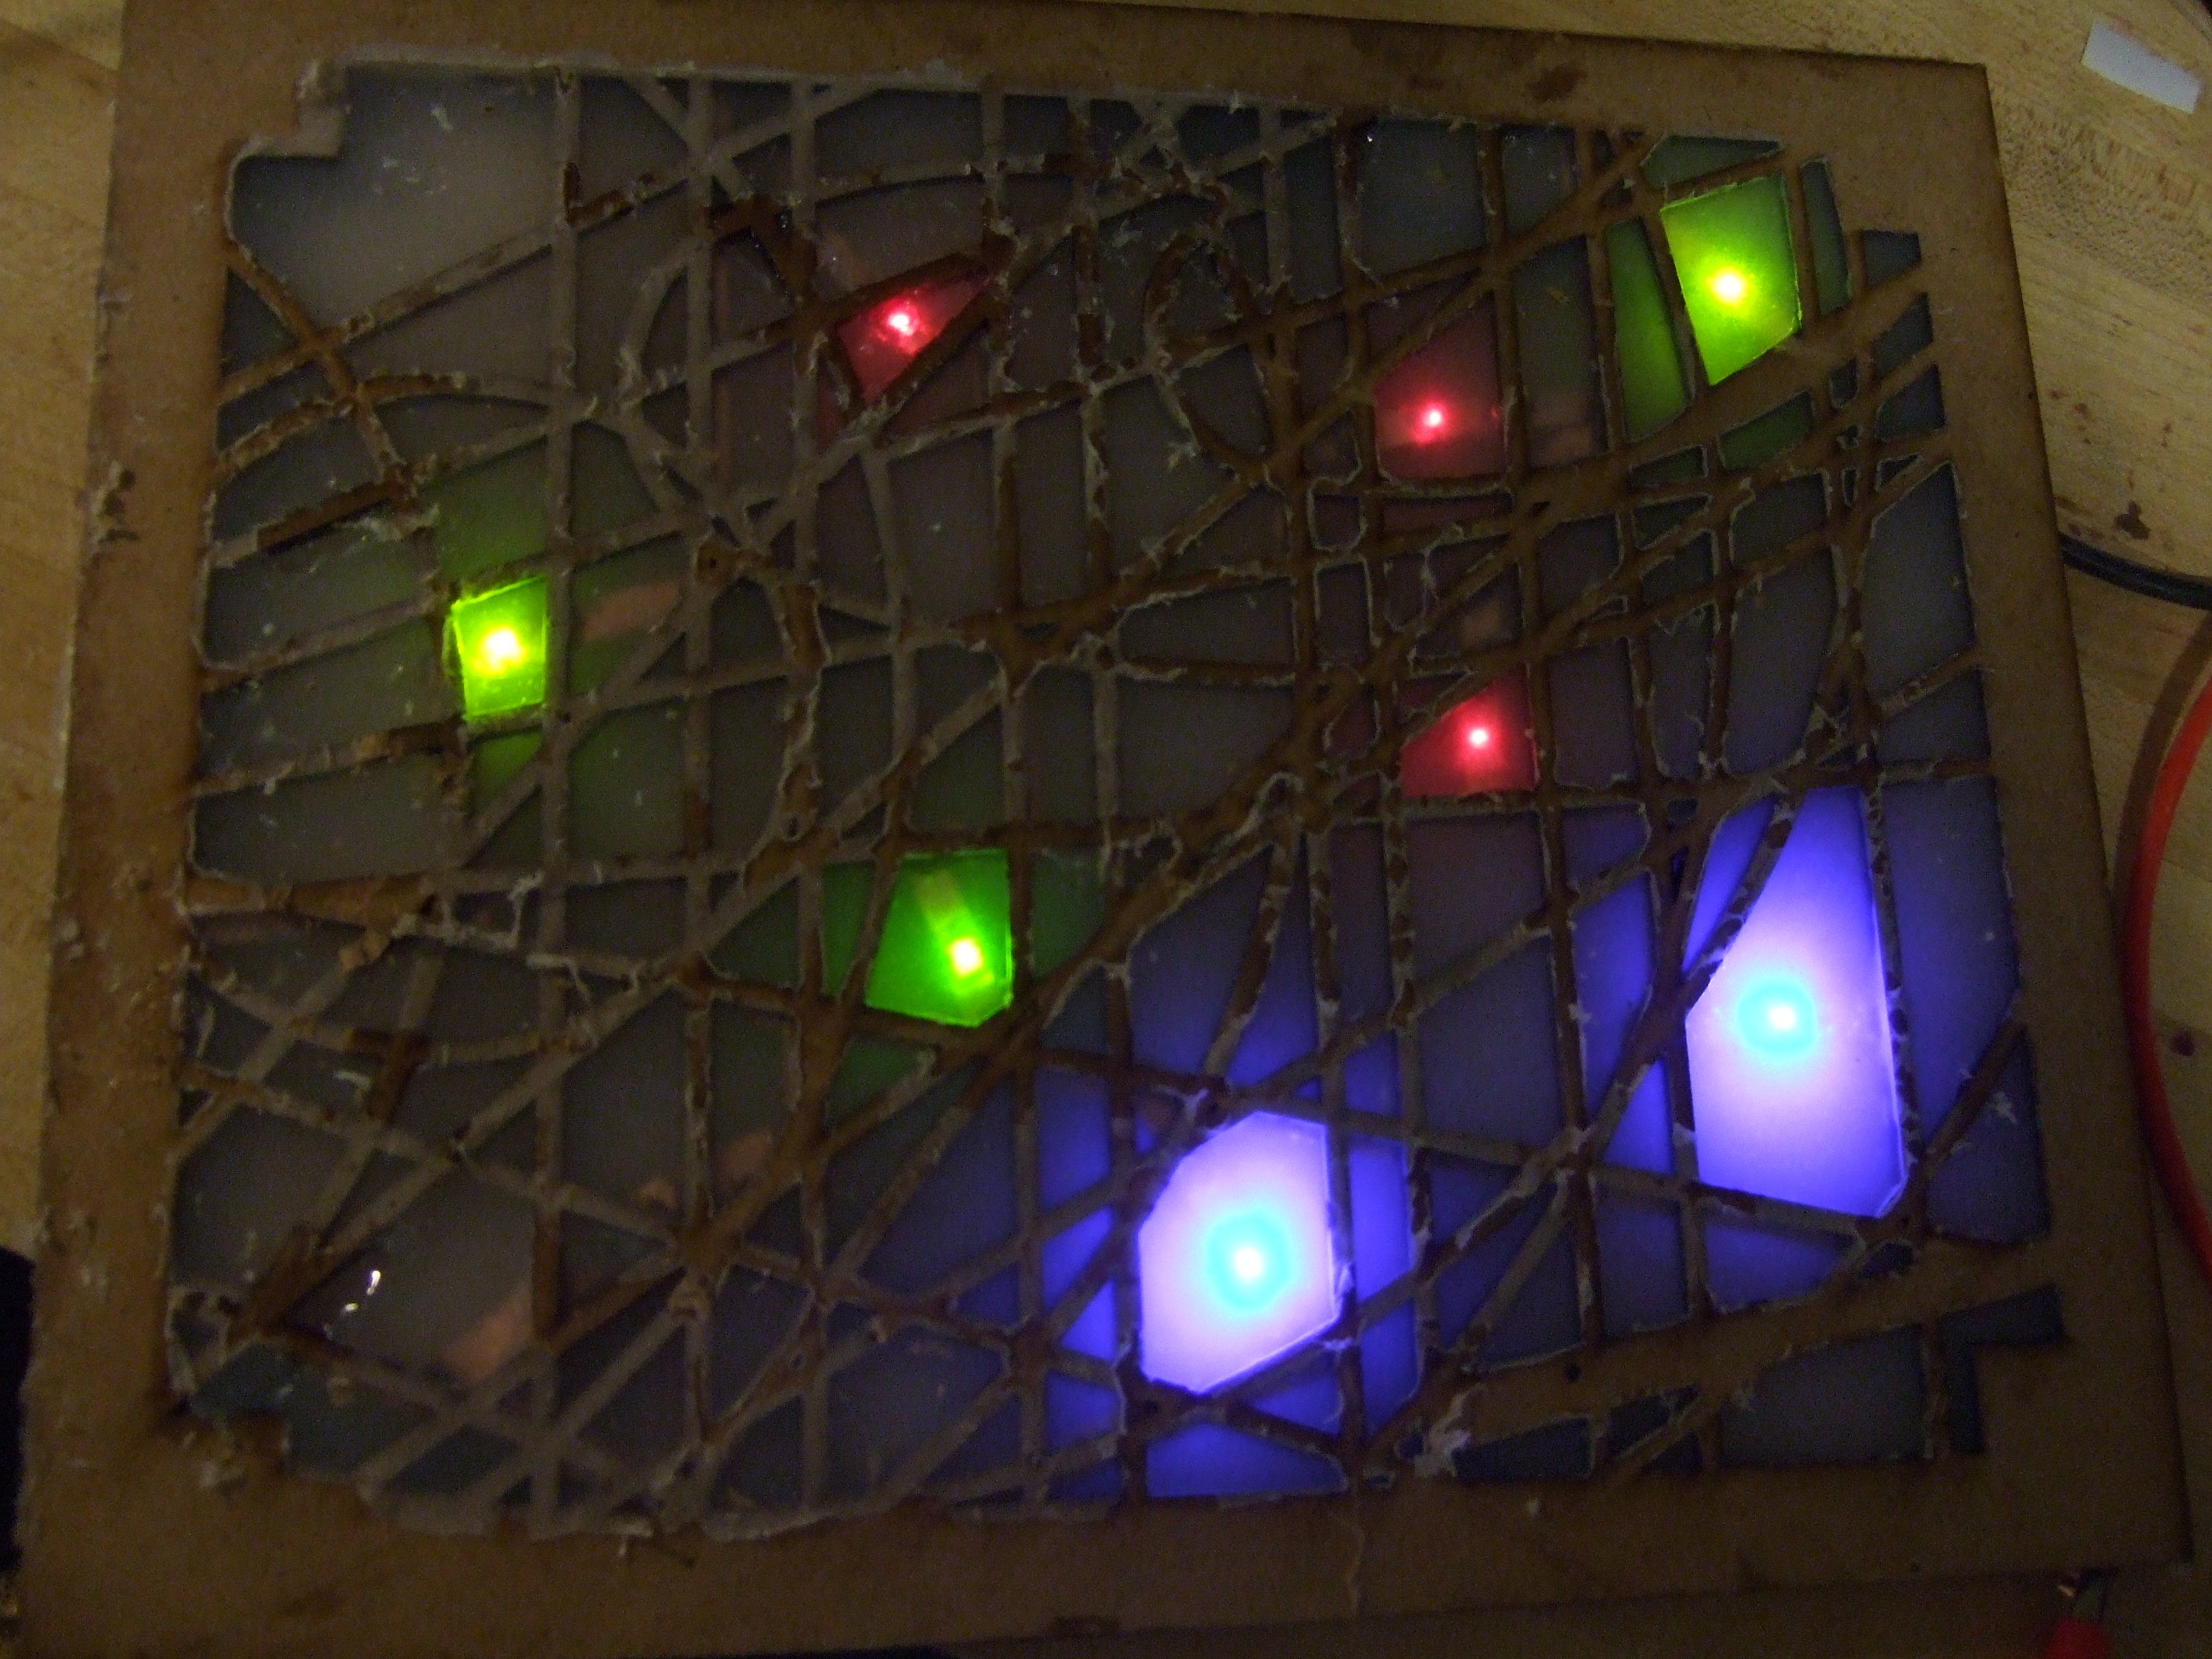
After de-molding I connected my silicone cast circuit to a power supply and voila! my LEDs lit up. In de-molding however, I damaged one of the electrical connections of my LEDs.
Click here for YouTube Video >>>
Lessons Learned:
- Think carefully about demolding – I hot glued for circuit onto the Masonite frame so that it would be secure. I originally wanted the circuit suspended in the silicone. This plan changed after fixing it to the Masonite frame.
- Demolding – thought I didn’t get to try it here with silicone, I would have tried PAM (spray cooking oil) on my Masonite for easy demolding.. I will next time I use silicone.
- Mixing of clear silicone – I wish there was some visual clue to know if your Part A and Part B of silicone was properly mixed (please invent someone). I mixed my silicone, and was careful to stir and not whip so as not to introduce too many bubbles in the mixture. There were some areas that did not cure properly, and it would be because of improper mixing of the two parts.
Vernelle Noel – Resources

This work by Vernelle Noel is licensed under a Creative Commons Attribution-NonCommercial-NoDerivs 3.0 Unported License.